
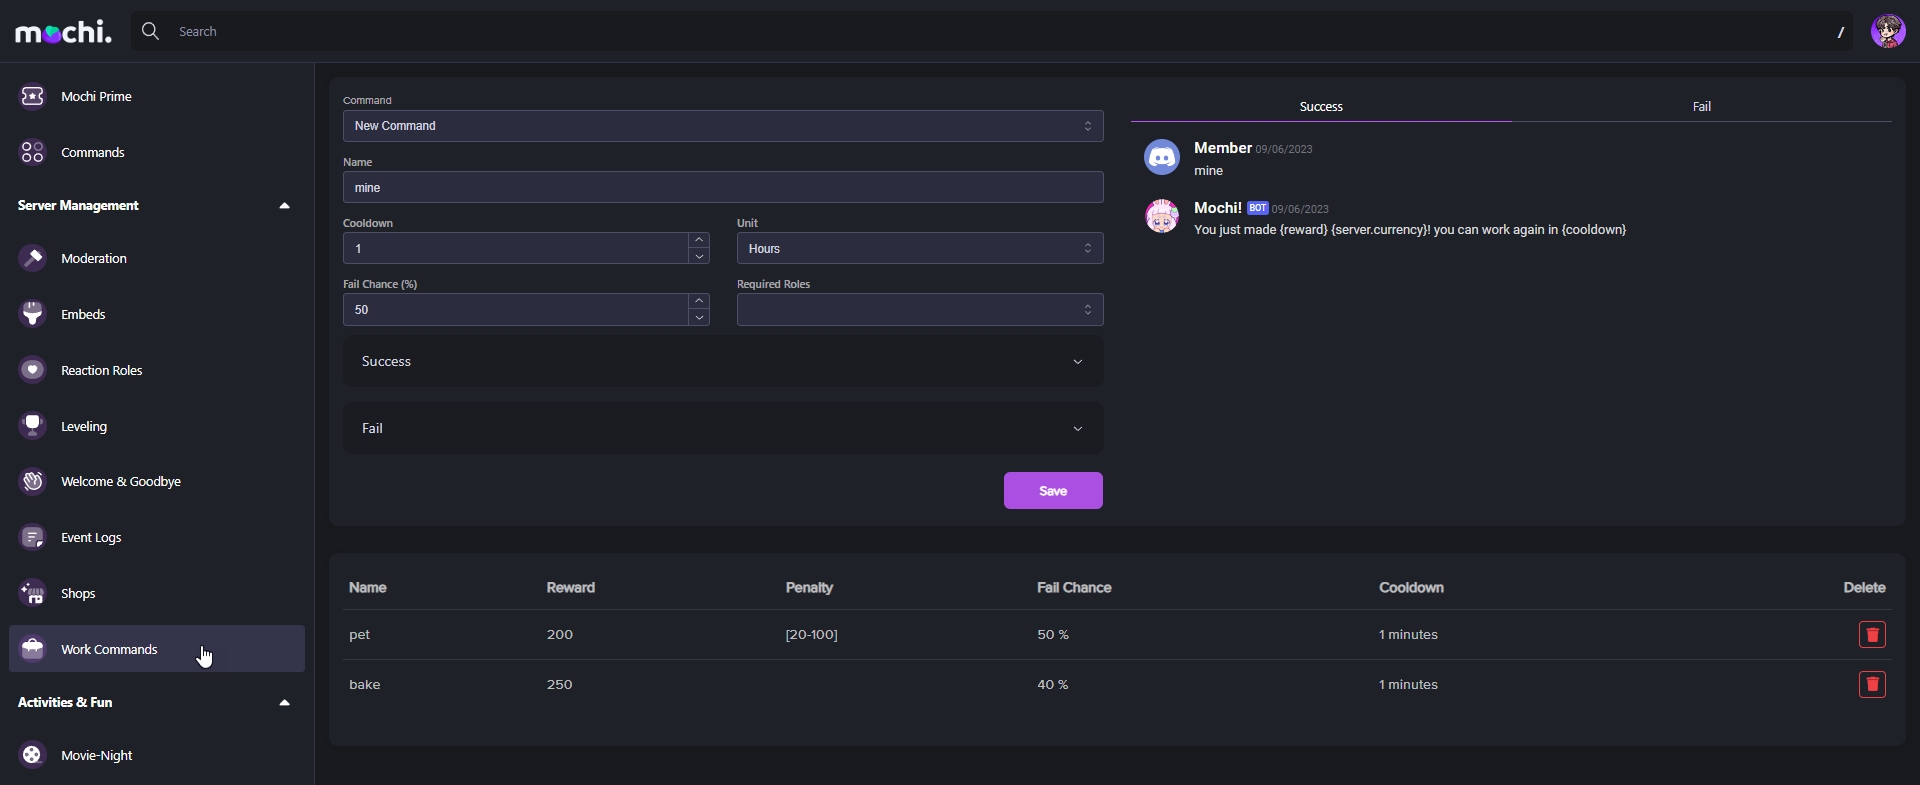
Creating a Work Command using the Mochi Dashboard
To begin, open up the Mochi "Work Commands" module. This awesome tool lets you store and access all your work commands in a super convenient spot.
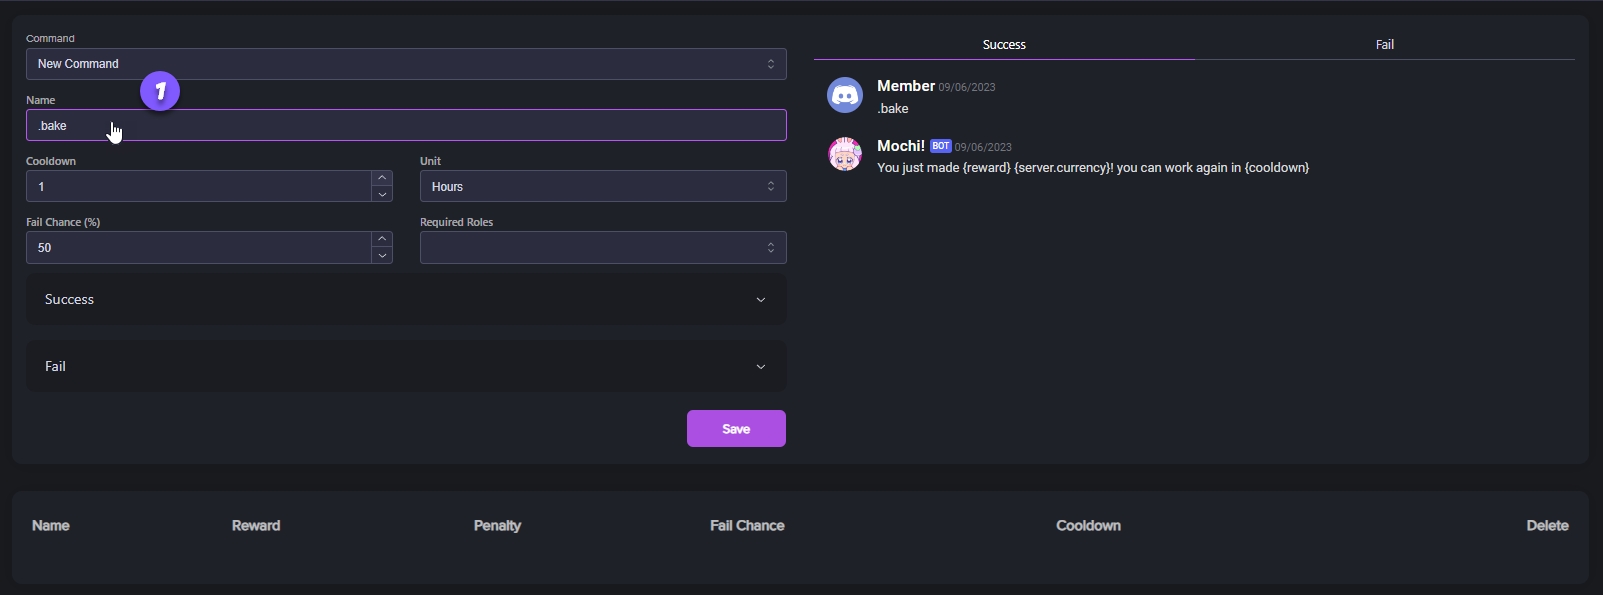
Step 1: Enter the Command Name
To make a new command, just click on "New Command" and type in the name you want in the "Name" field.
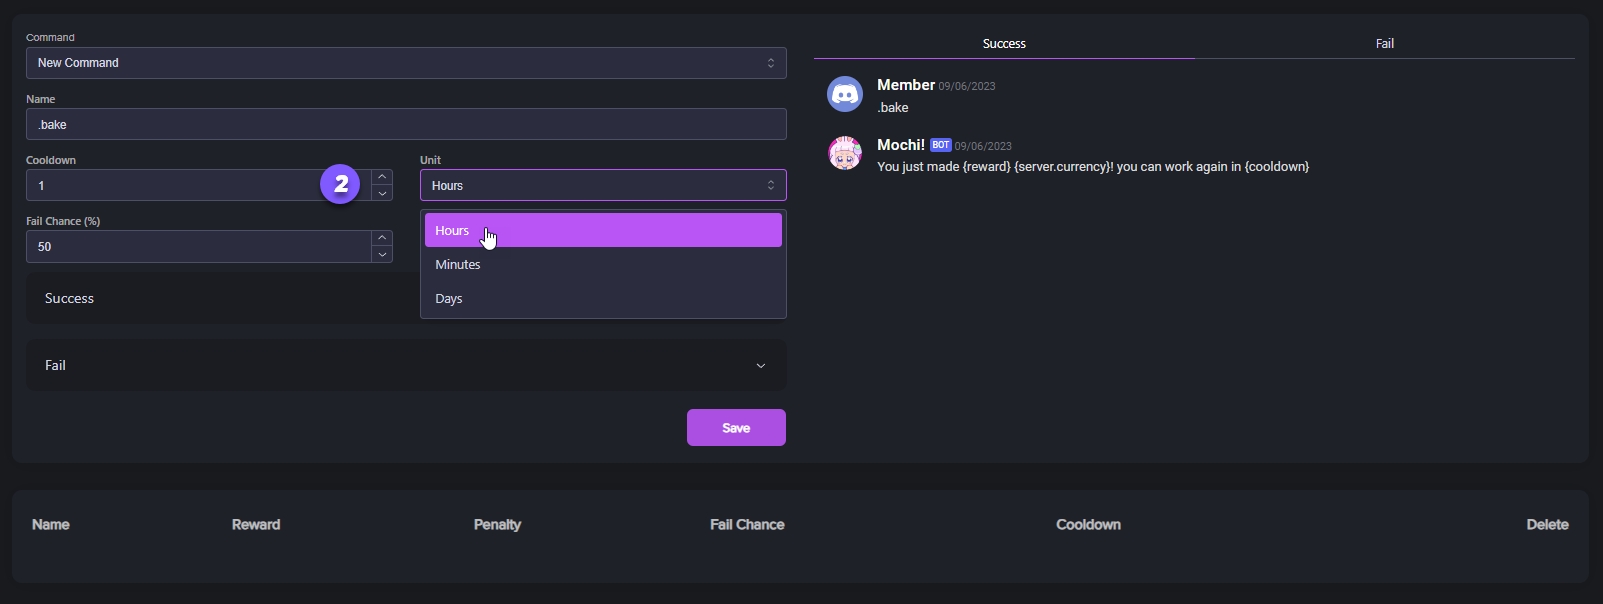
Step 2: Set the Cooldown
You have the option to select how long you want to wait before using your work command again. You can choose the duration of the cooldown period in minutes, hours, or days. This will determine the amount of time you need to wait before using the command again.
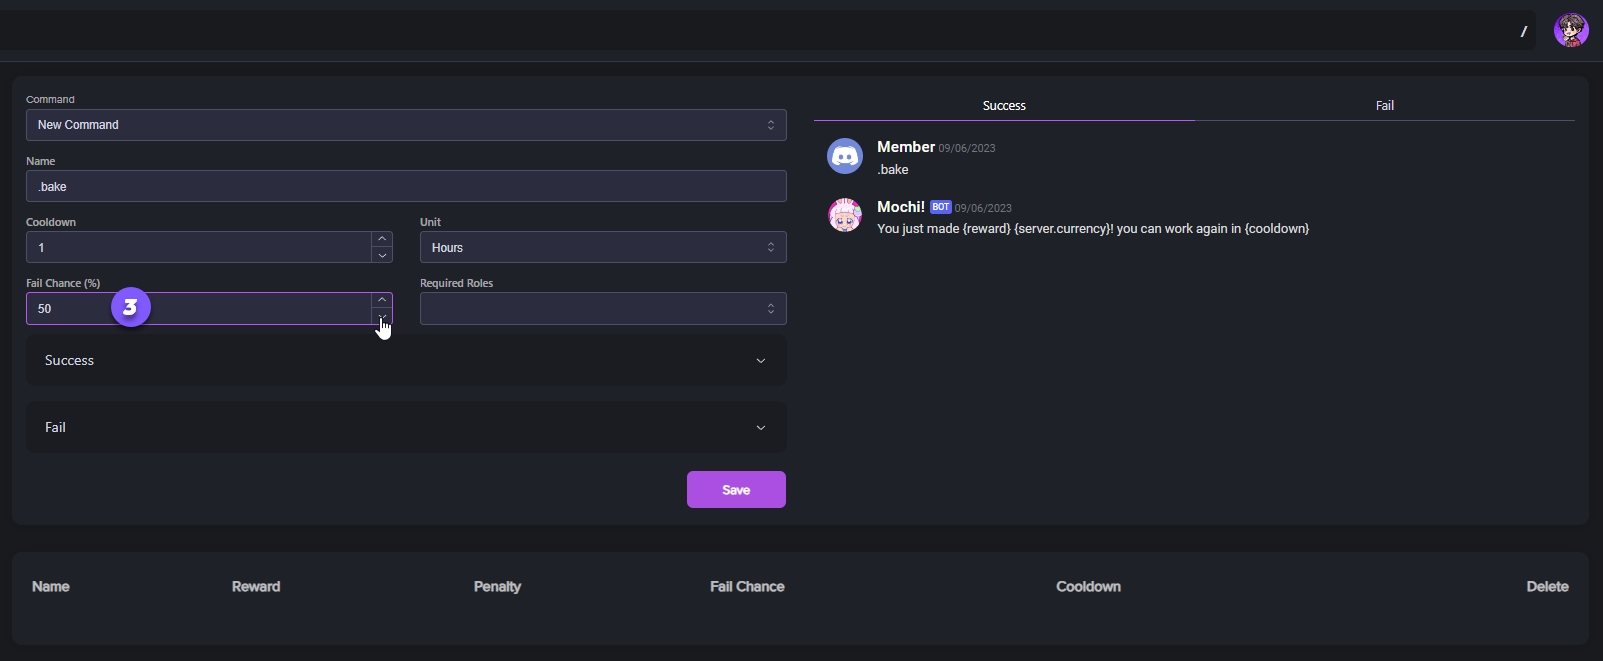
Step 3: Set the Fail Rate
You can control the chances of your command succeeding or failing. You just need to adjust the percentage to increase your chances of success or decrease the chances of failure. Of course, you can also do the opposite if that's what you prefer!
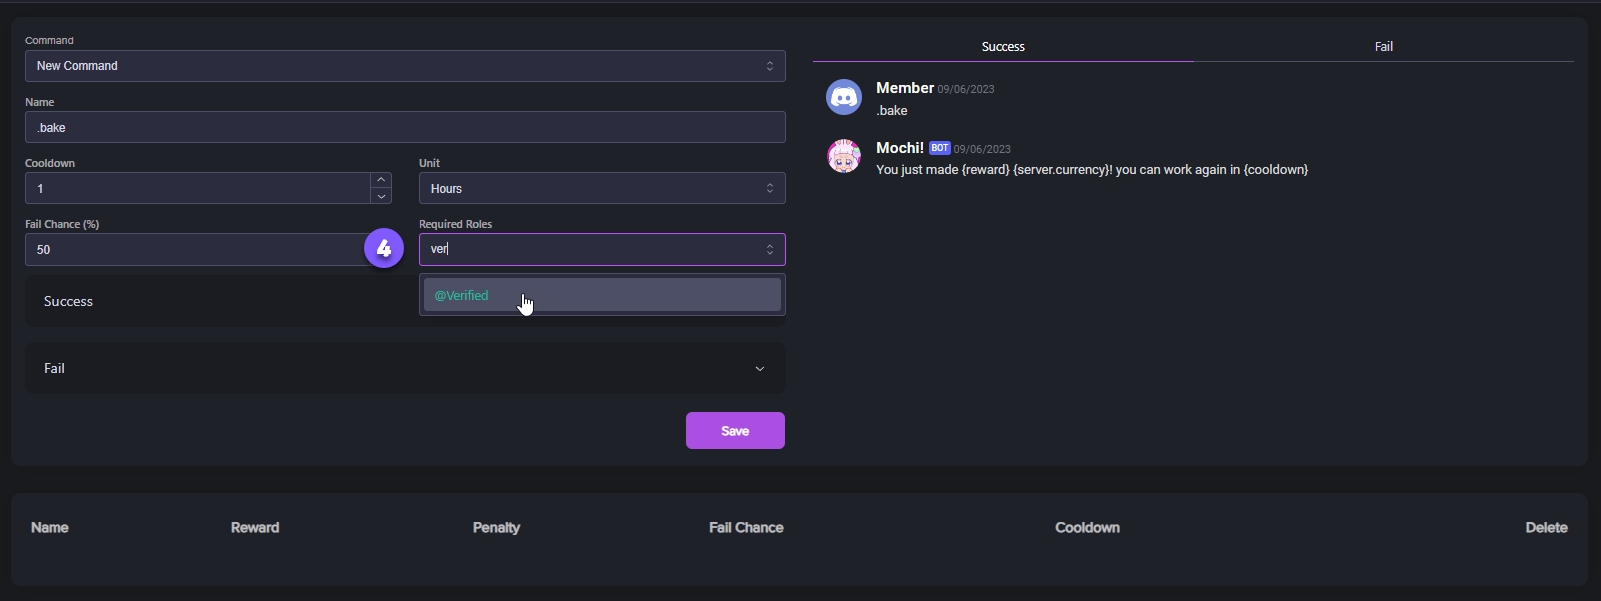
Step 4: Set Required Roles
Assigning specific roles to users can help manage access to commands and ensure everything runs smoothly.
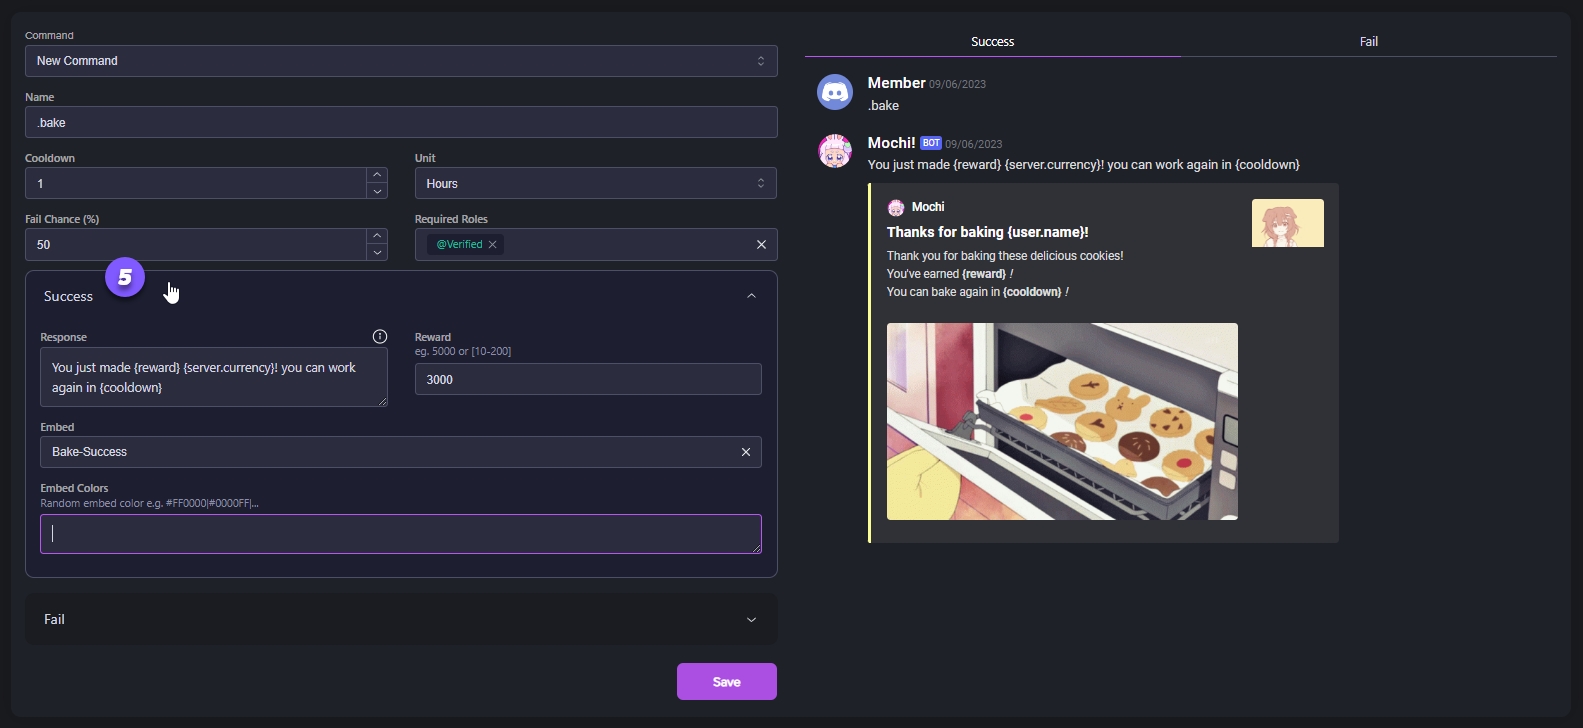
Step 5: Customize the Success Message / Success Embed
The success section of the work command dashboard allows you to create a customized success message for the successful completion of a work command.
You can also use a customized embed using the Mochi Dashboard along with variables for an even more unique response.
Check out the Setting up Success Messages section for detailed instructions on how to set it up correctly.
Step 6: Customize the Fail Message / Fail Embed
The fail section of the work command dashboard allows you to create a customized success message for the unsuccessful completion of a work command.
You can also use a customized embed using the Mochi Dashboard along with variables for an even more unique response.
Check out the Setting up Fail Messages section for detailed instructions on how to set it up correctly.
Once you've set up all the important settings for your command, make sure to hit "Save" to ensure that your new work command is securely saved.
Last updated