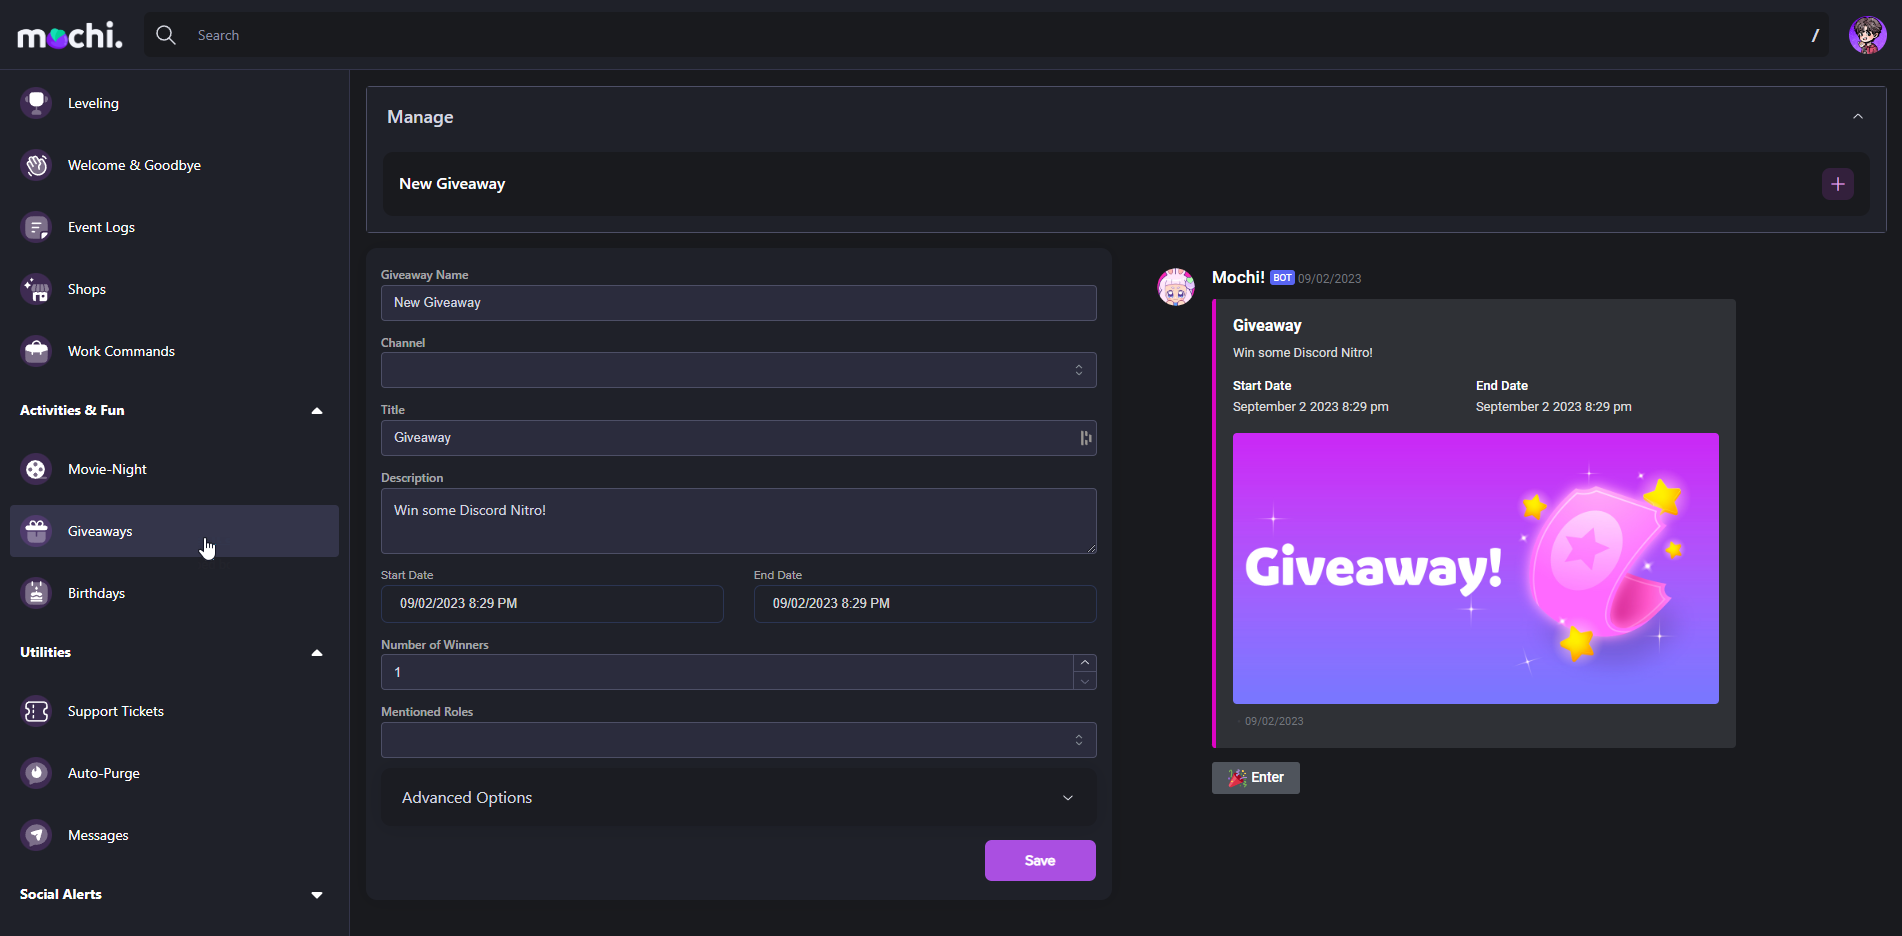
Setting up a Giveaway

Launch Mochi's Giveaway Module

If you want to organize some really cool giveaways, Mochi's giveaway module is definitely the way to go!

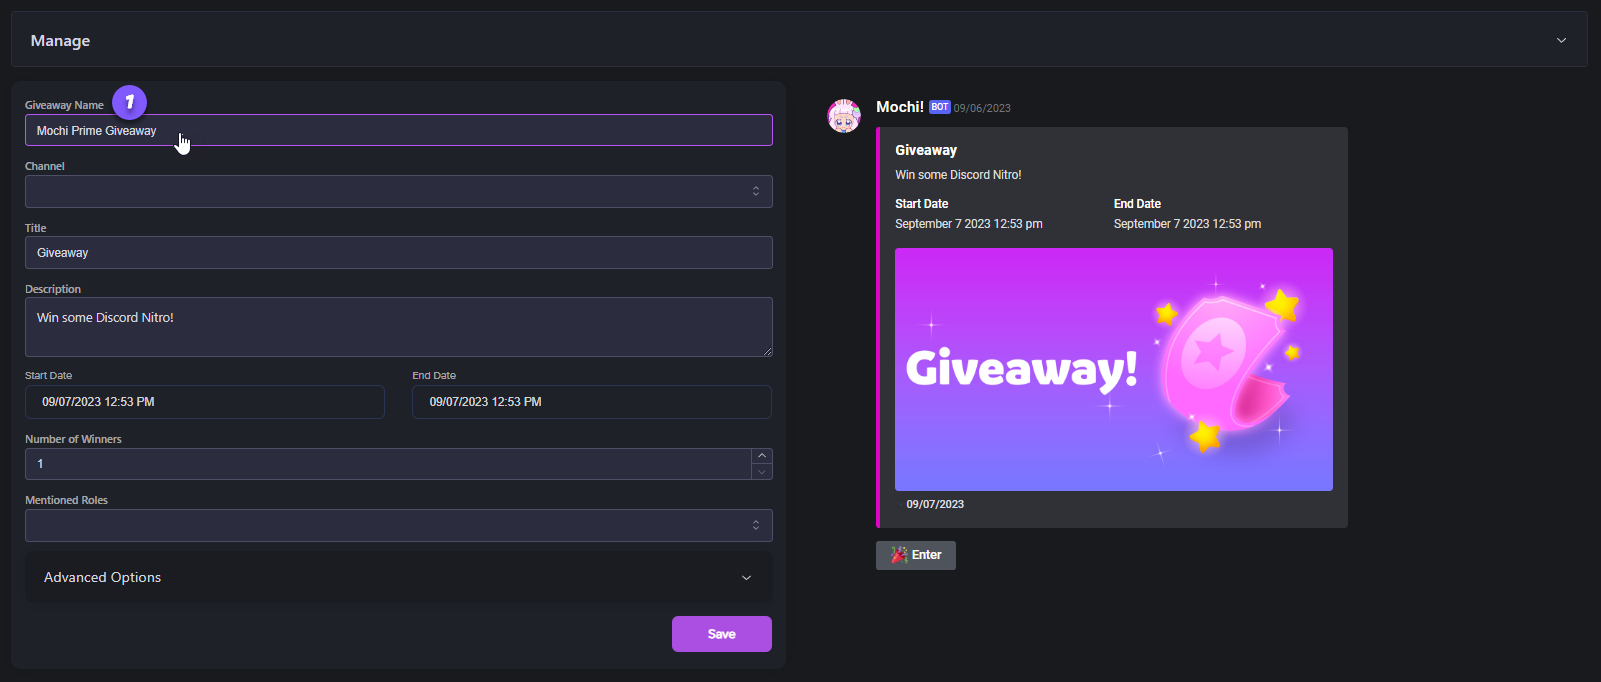
Step 1: Choose a Giveaway Name

Please select a name for your giveaway in the "Giveaway Name" section.

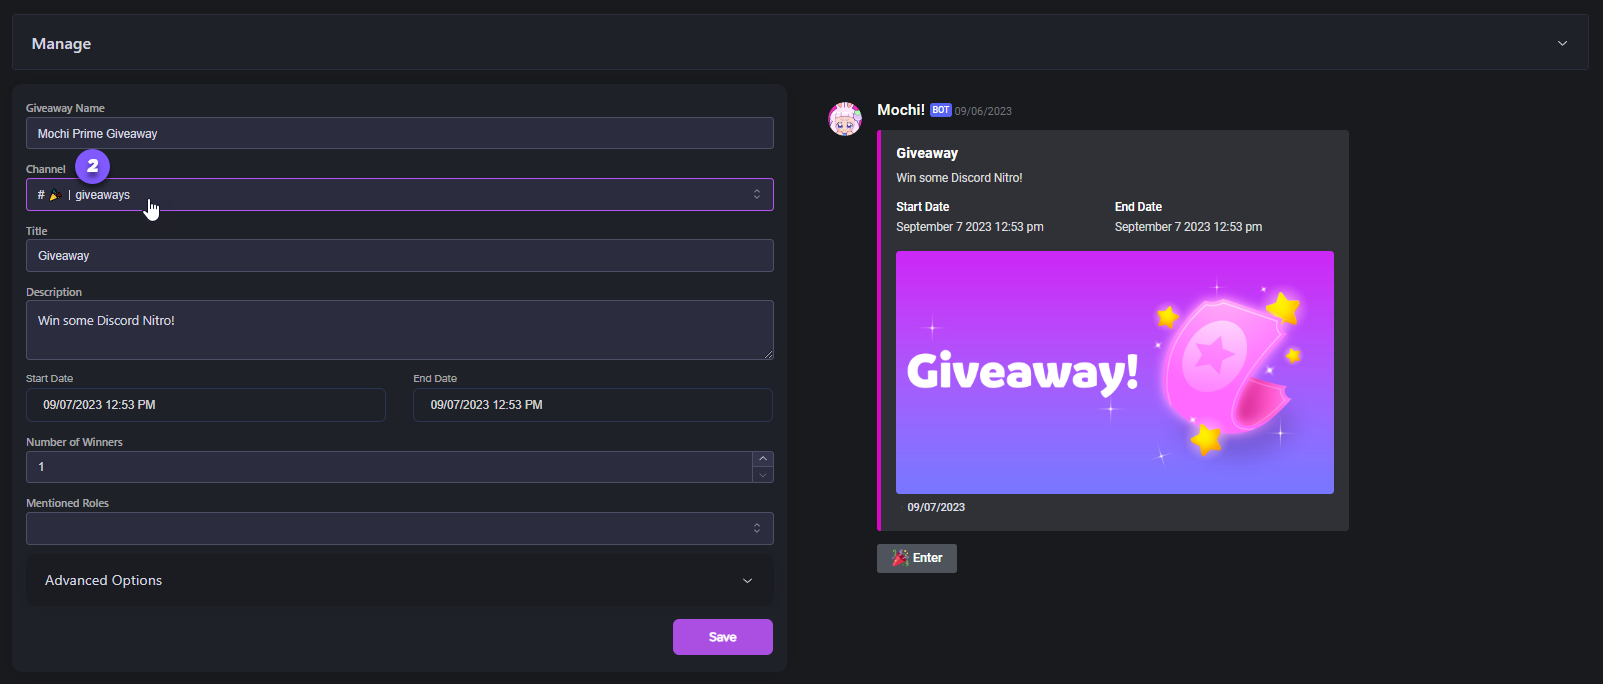
Step 2: Select the Channel

Choose the channel you want to use from the dropdown menu under the "Channel" field. It's super simple!

Step 3: Enter a Title for the Giveaway

Let's come up with a catchy title. It'll draw in even more people and make your giveaway really pop!

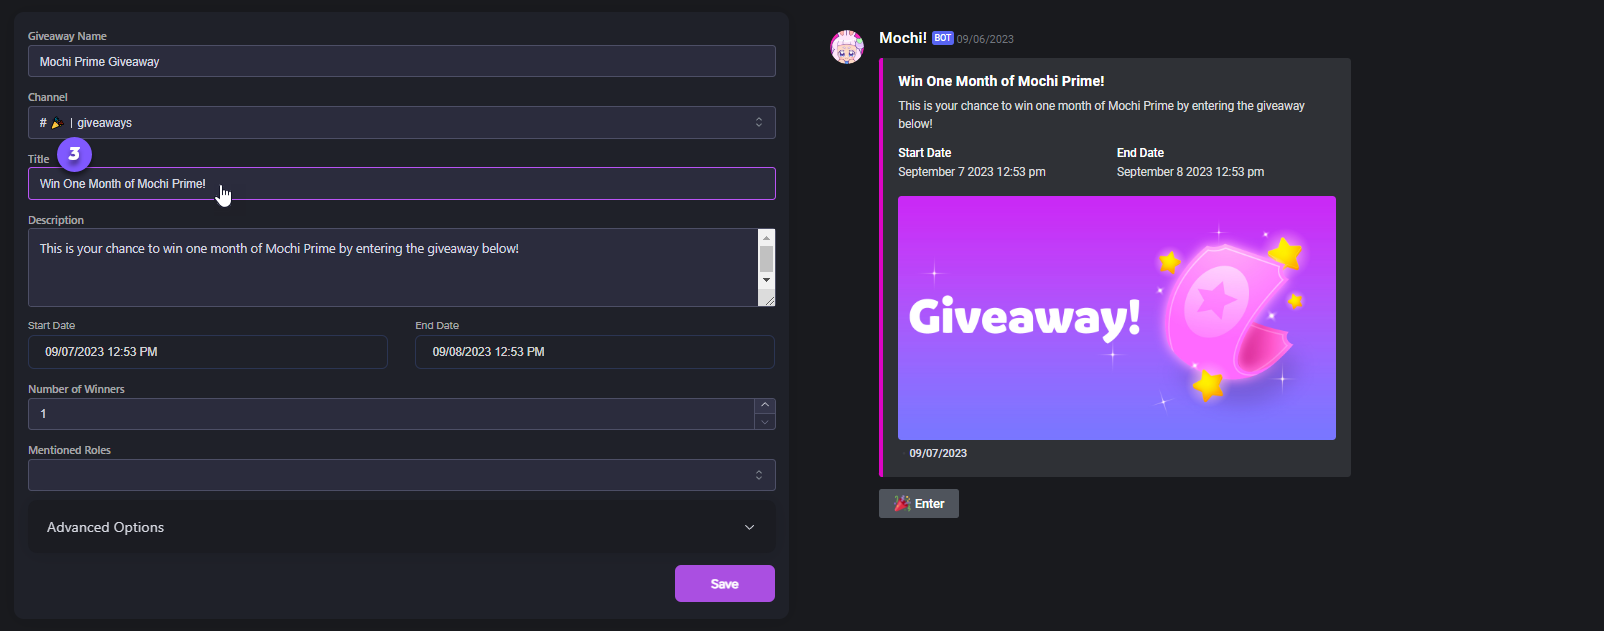
Step 4: Write the Description

Let's add some more info about your giveaway! Just go ahead and fill out the "Description" field. You can even make it more personalized by using Mochi variables!

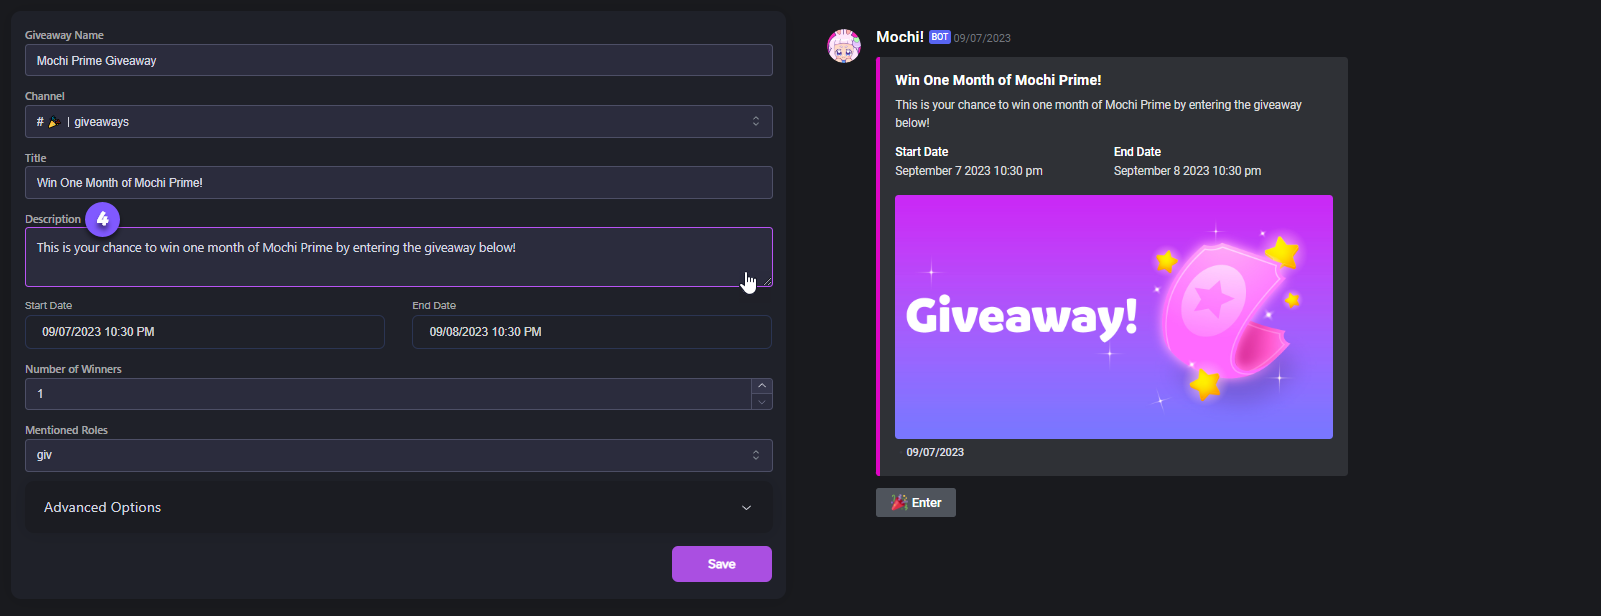
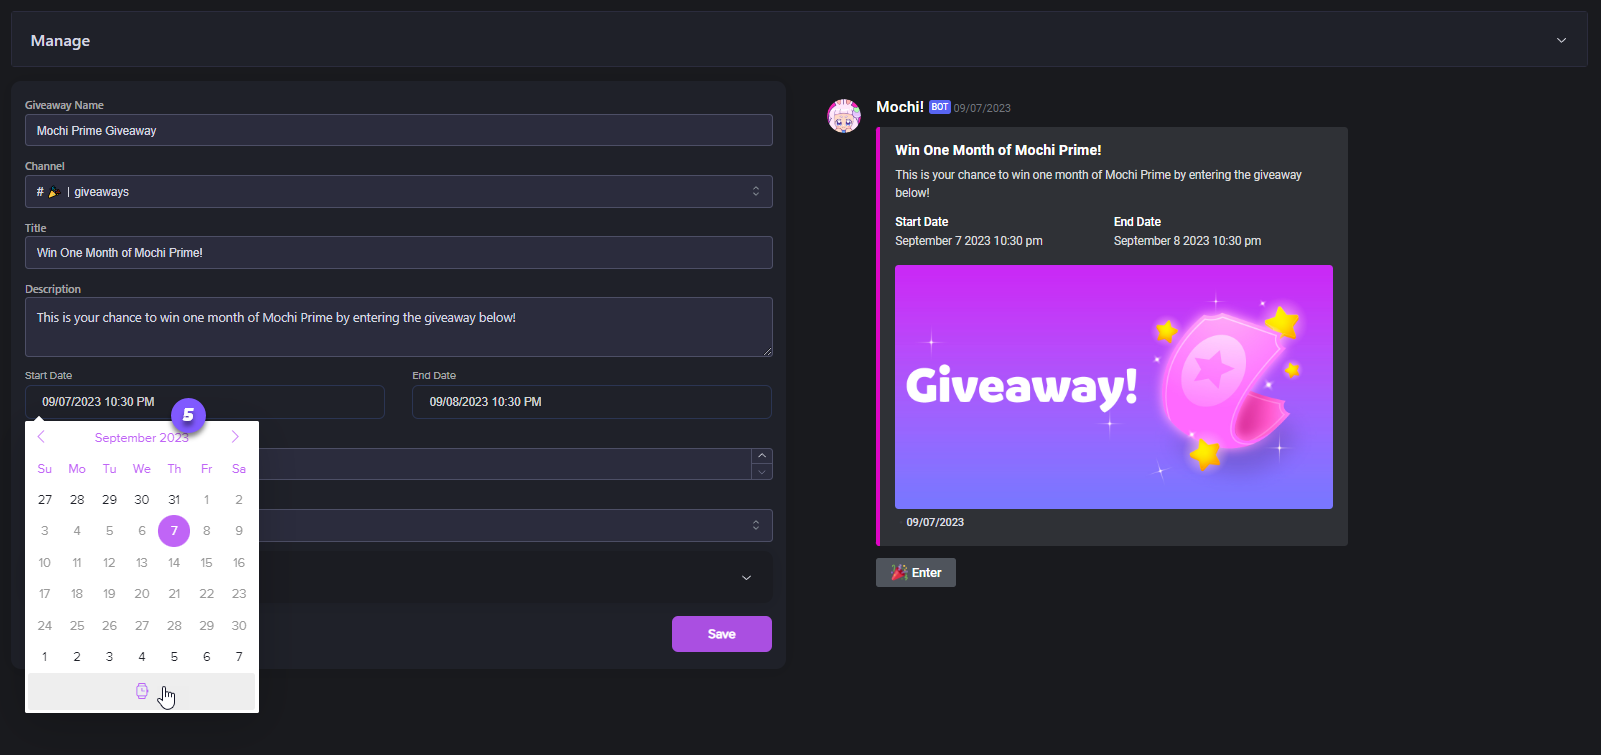
Step 5: Set the Start Date & Time

To select the start date for your giveaway, just use the handy built-in calendar in the "Start Date" section. To specify the exact time it should begin, just click on the watch icon!

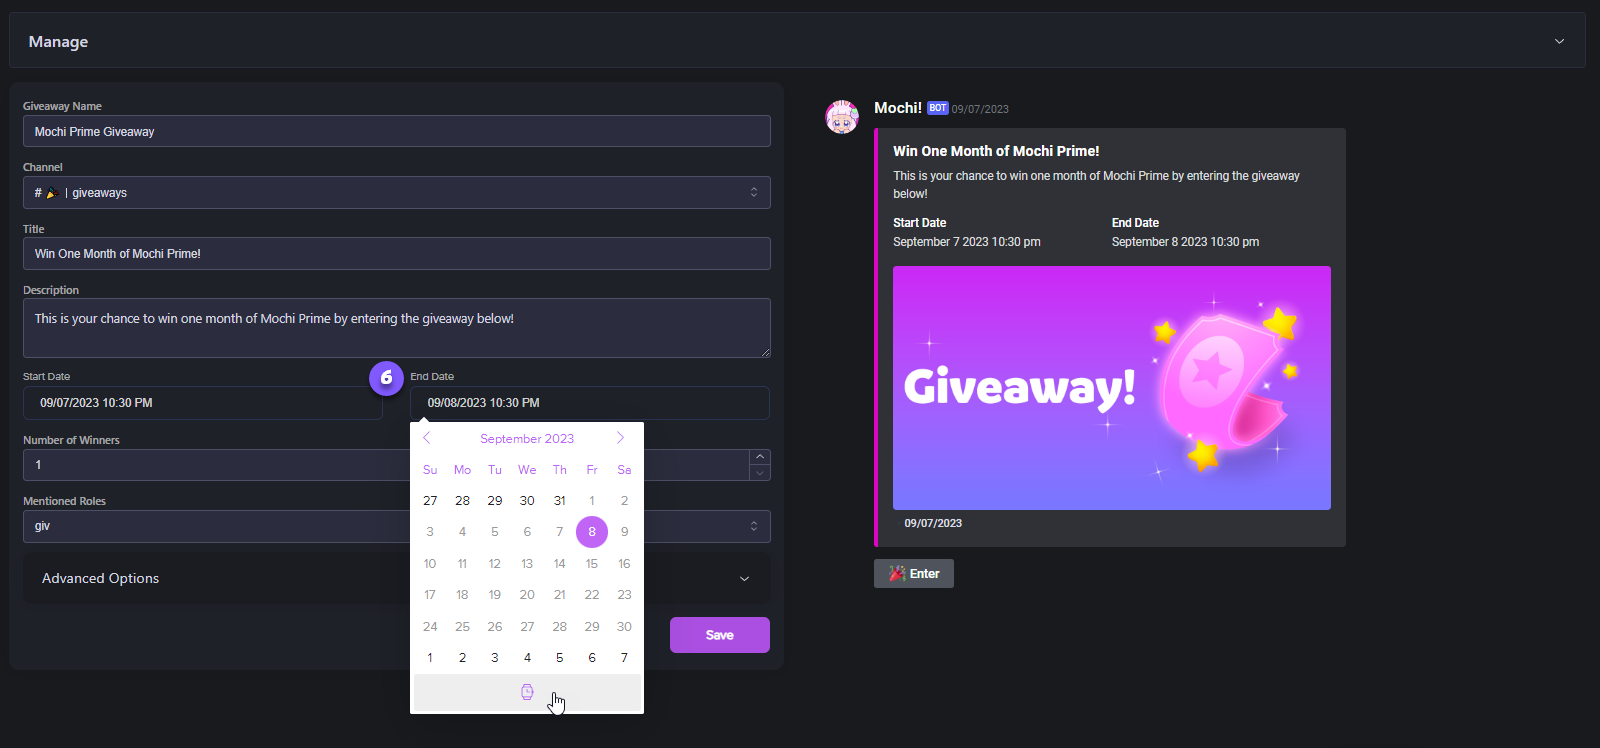
Step 6: Set the End Date and time

You can easily select the end date for your giveaway in the "End Date" section using the calendar feature. Just click on the watch icon to set the specific time when the giveaway should end.

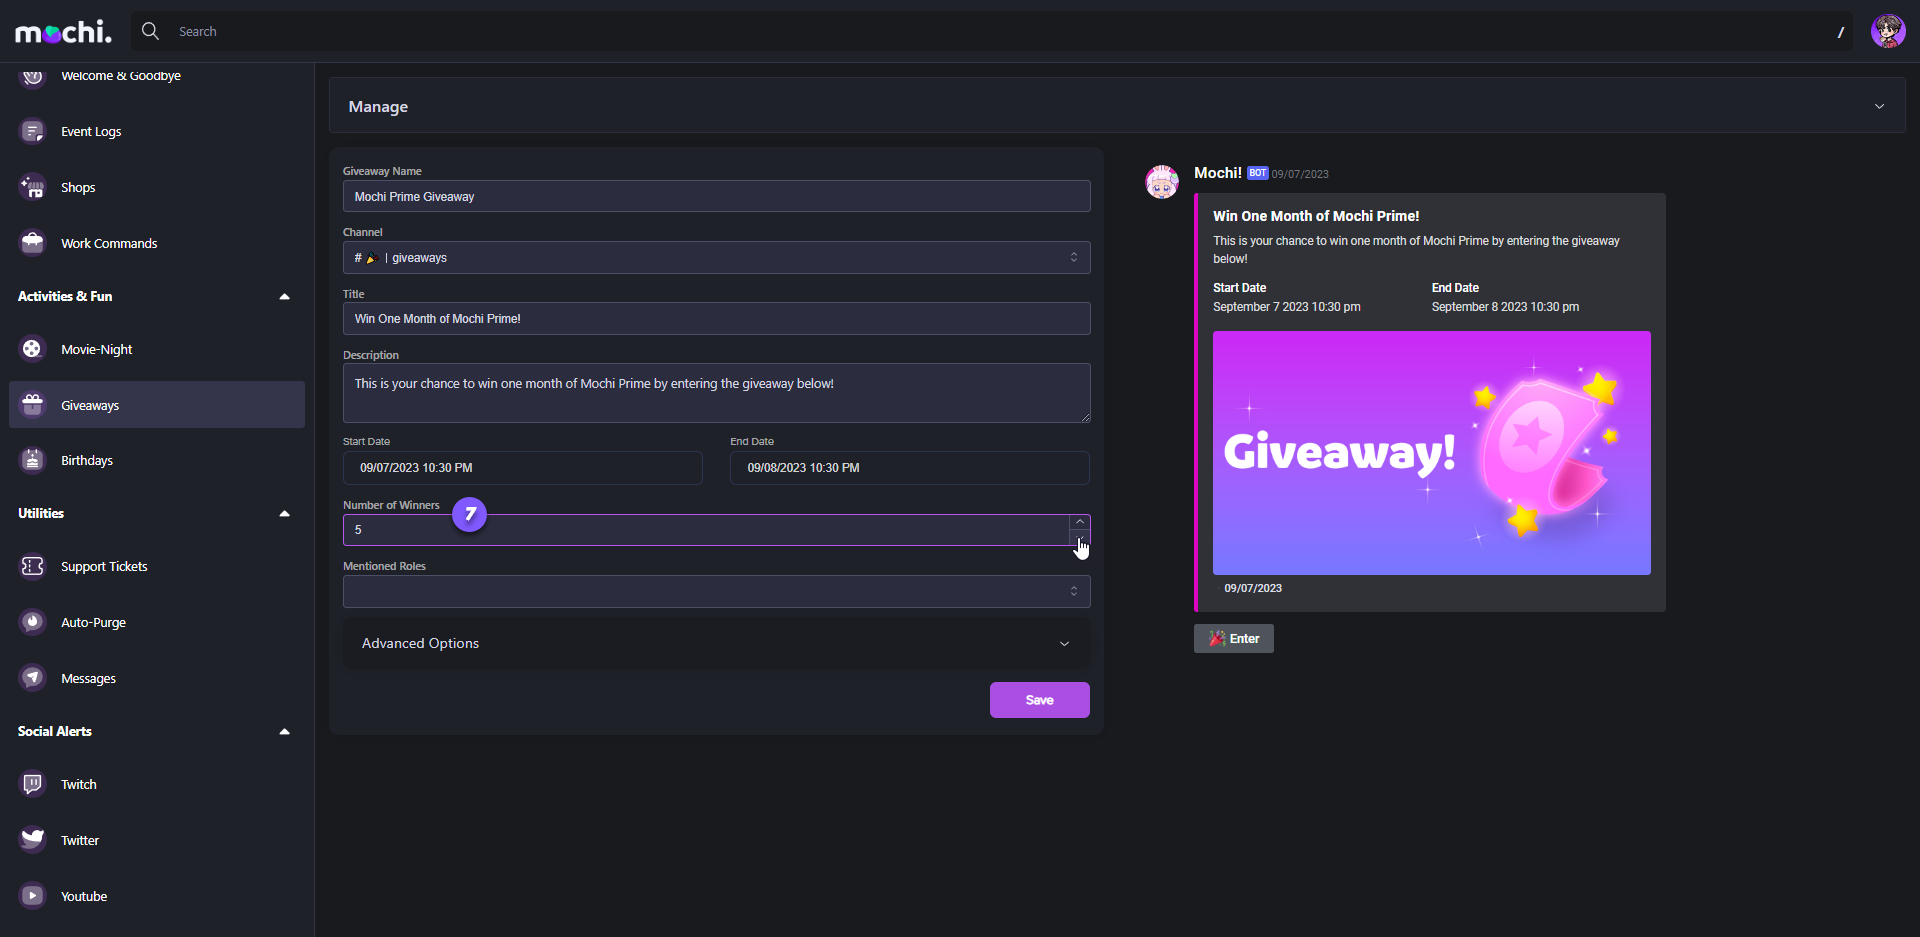
Step 7: Determine the Number of Winners

To choose how many lucky winners you'll have for your giveaway, just type in the number of winners you want in the "Number of Winners" box.

Step 8: Choose the Giveaway Ping Role

Click on the "Mentioned Roles" dropdown. From there, choose the role you want to ping to announce the giveaway. Once you have completed all the necessary steps, click on "Save" to schedule your giveaway.

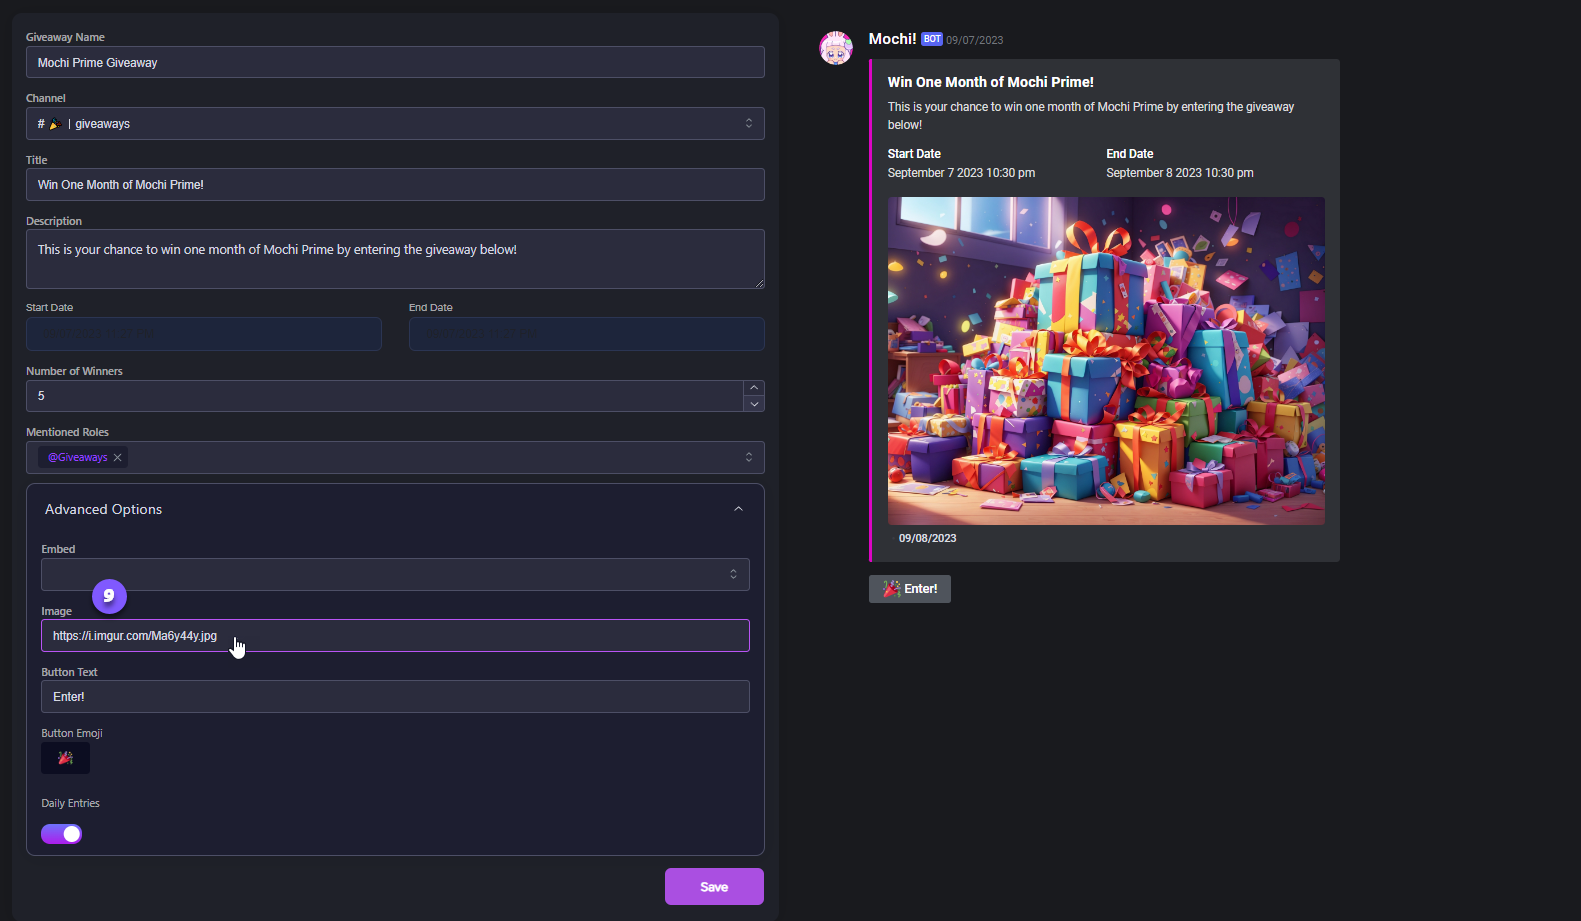
Step 9: Customize the Giveaway Embed Banner (Optional)

You can optionally add a customized Embed Banner by opening the "Advanced Options" menu and entering an image link in the "Image" section.

With our free plan, you have the opportunity to host up to 3 giveaways at the same time. However, if you upgrade to Mochi Prime, you can host up to 10 giveaways.

Last updated