Creating Ticket Buttons

Setting up ticket actions with custom labels and icons is a breeze with Mochi Dashboard! You can add a touch of personality to your support panel and really make it your own. It's a great way to match your server's vibe or showcase your brand.

Let's get started! Simply click on the "Buttons" tab in the Actions panel to begin.

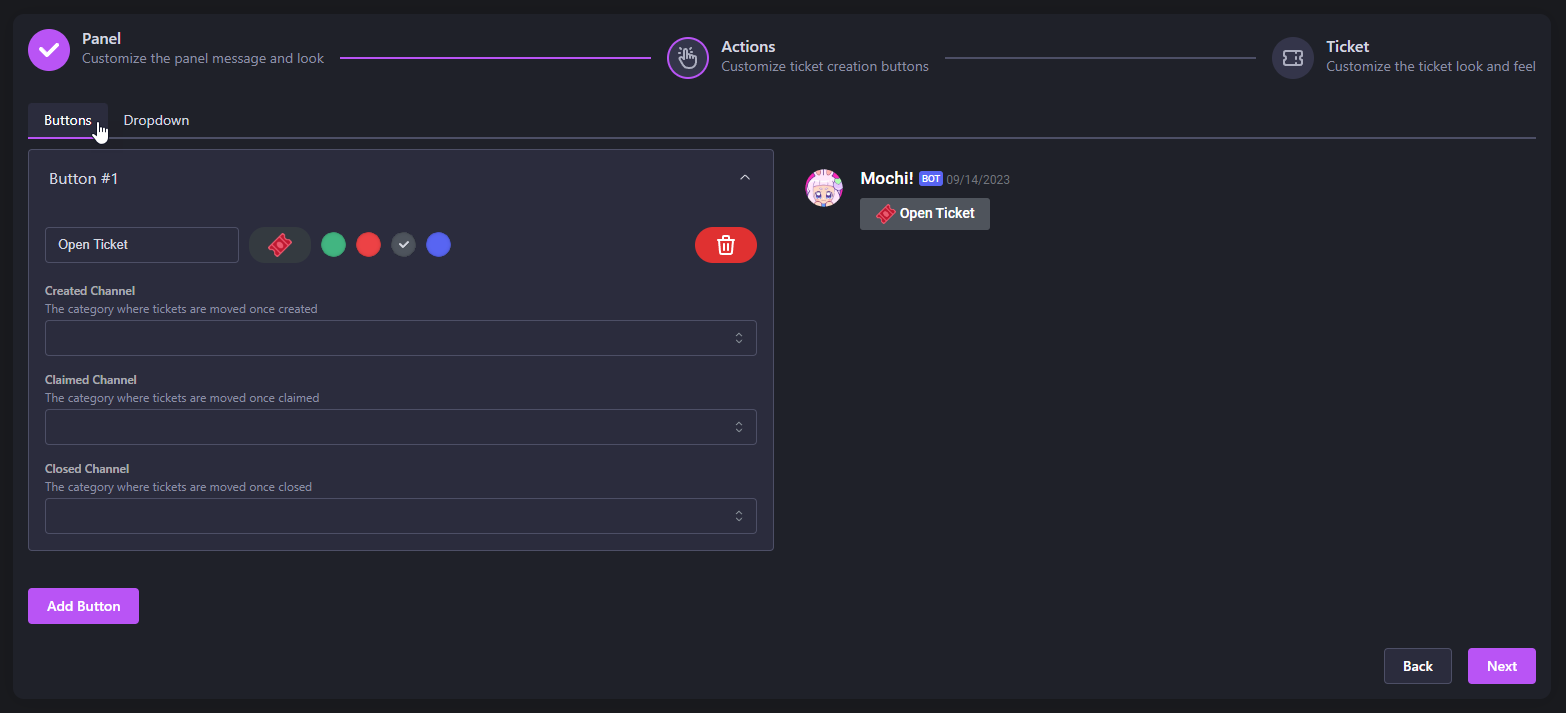
Step 1: Customize the Button Label

To get started, simply click on the Button Dropdown and you'll see the button customization menu pop up. Next, type in a brief and clear name for your first support ticket action using the box provided.

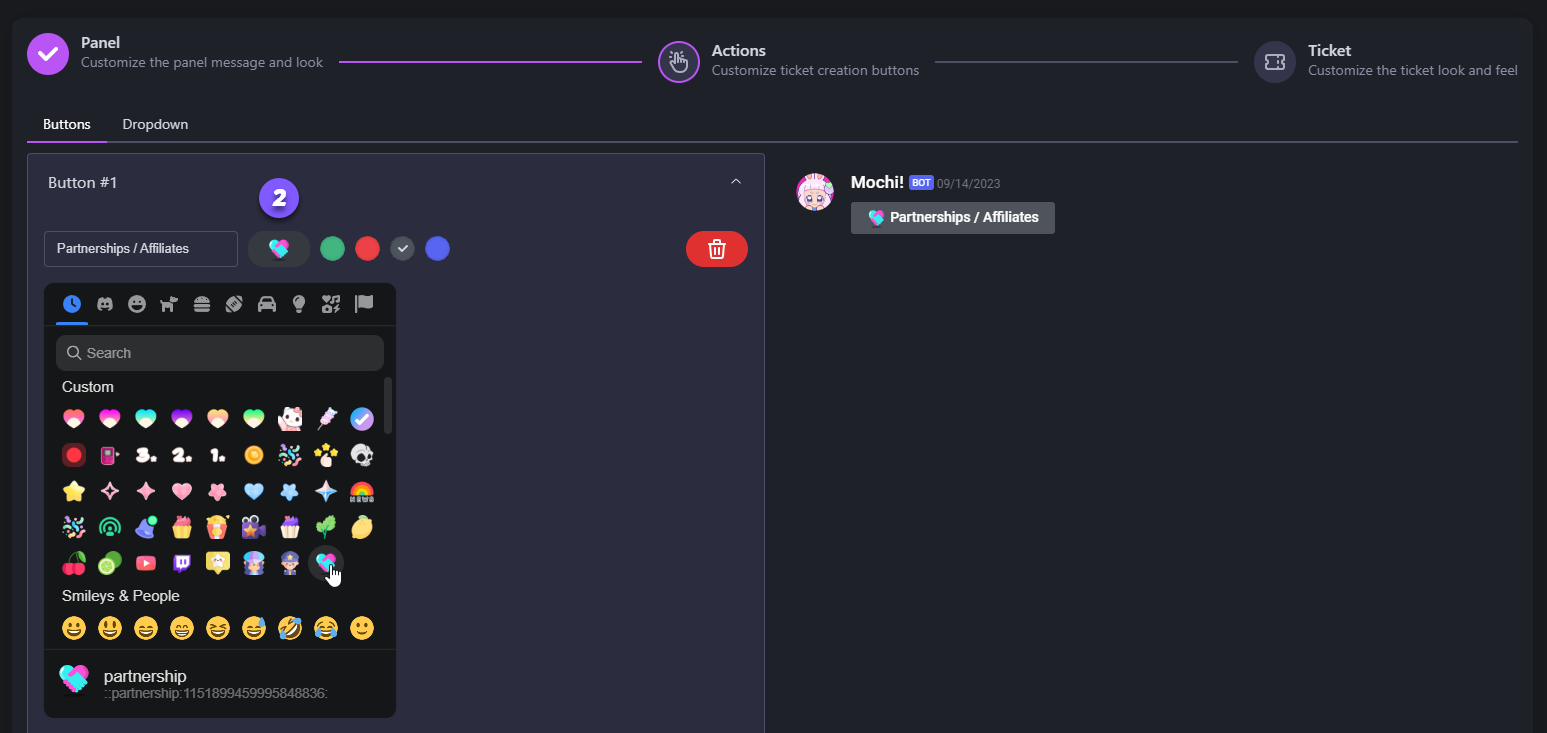
Step 2: Customize the Button Emoji

Want to make your buttons stand out even more? It's easy - just add an emoji! Simply click on the emoji icon to browse through all your options. Once you've found the perfect one, click the icon again to add it to your button. And while you're at it, don't forget that you can choose from green, red, grey, and blue for the color of your buttons!

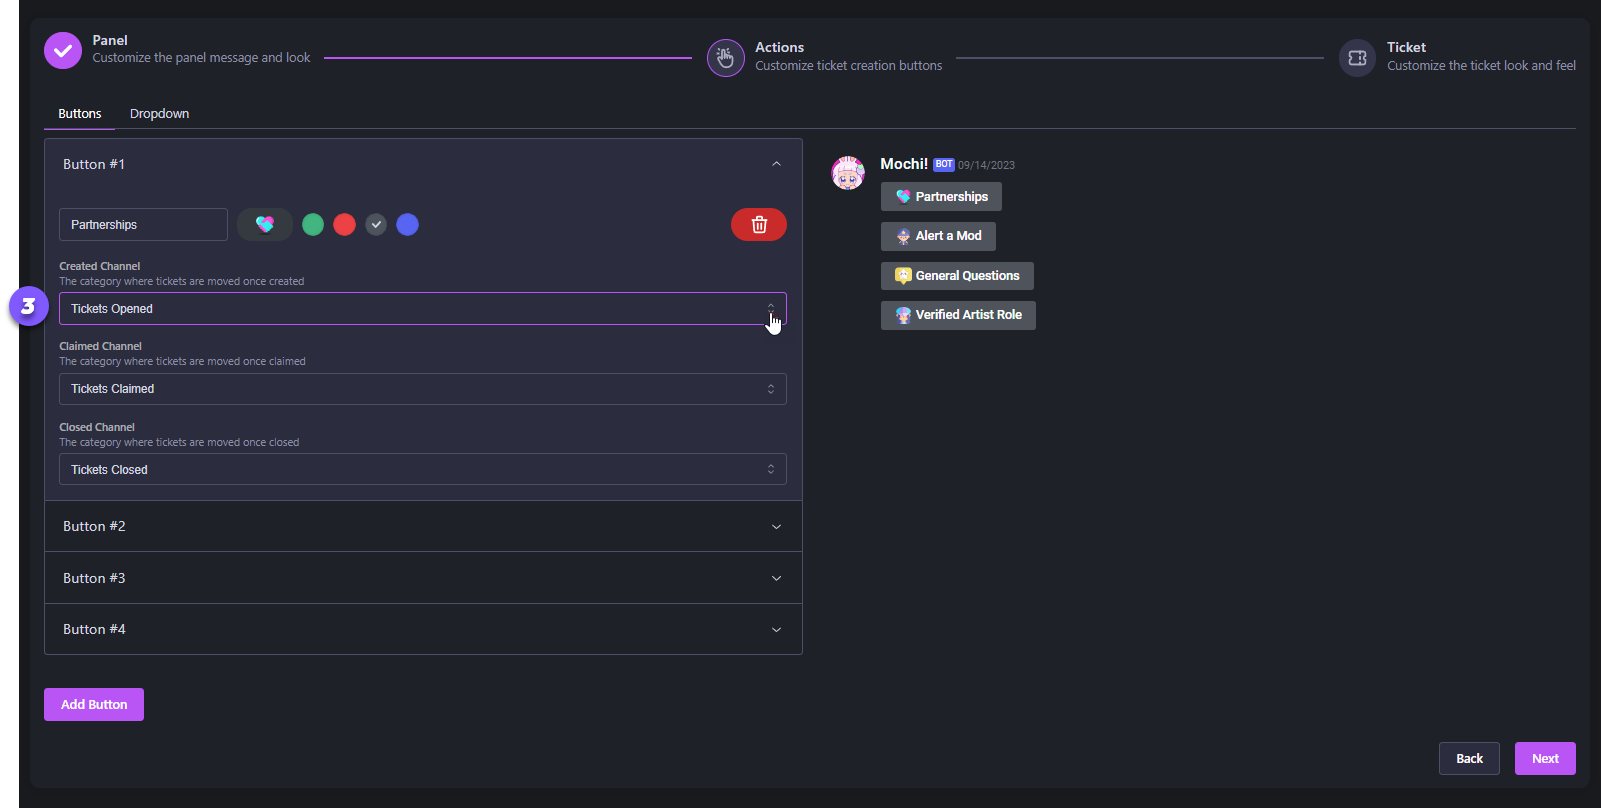
Step 3: Set the Created Ticket Channel

To make sure you get all the tickets that are open, you'll need to create a special category for private channels. This way, Mochi and anyone with the Manager role can easily see the channels in this category.

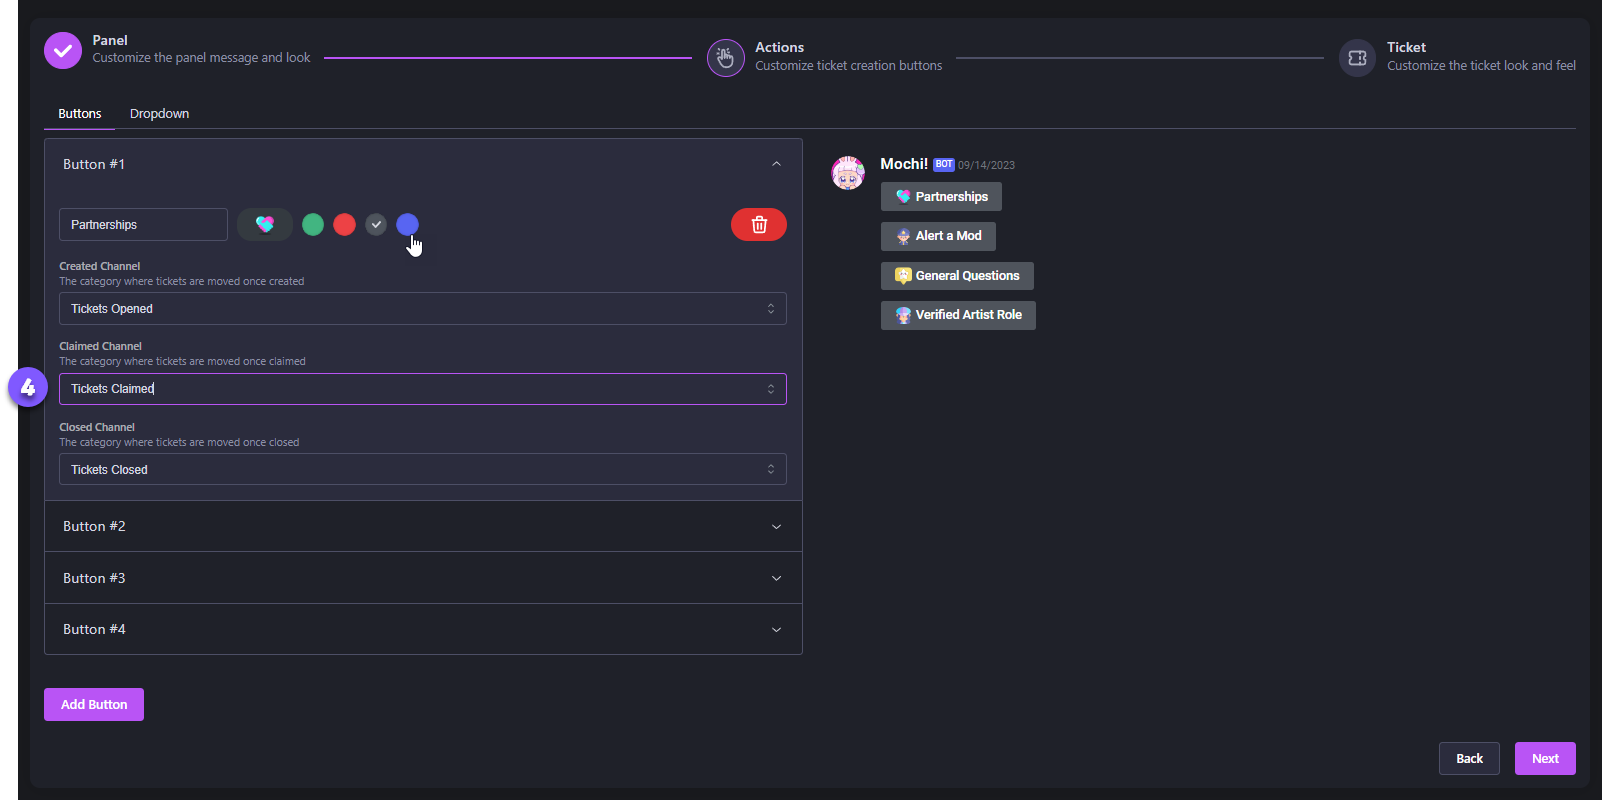
Step 4: Set the Claimed Ticket Channel

To make sure you can take care of an open ticket, it's important to create a special category just for that. This category will be visible to both Mochi and anyone with the Manager role. Once a Manager has claimed a ticket, only they can manage it until the ticket is resolved.

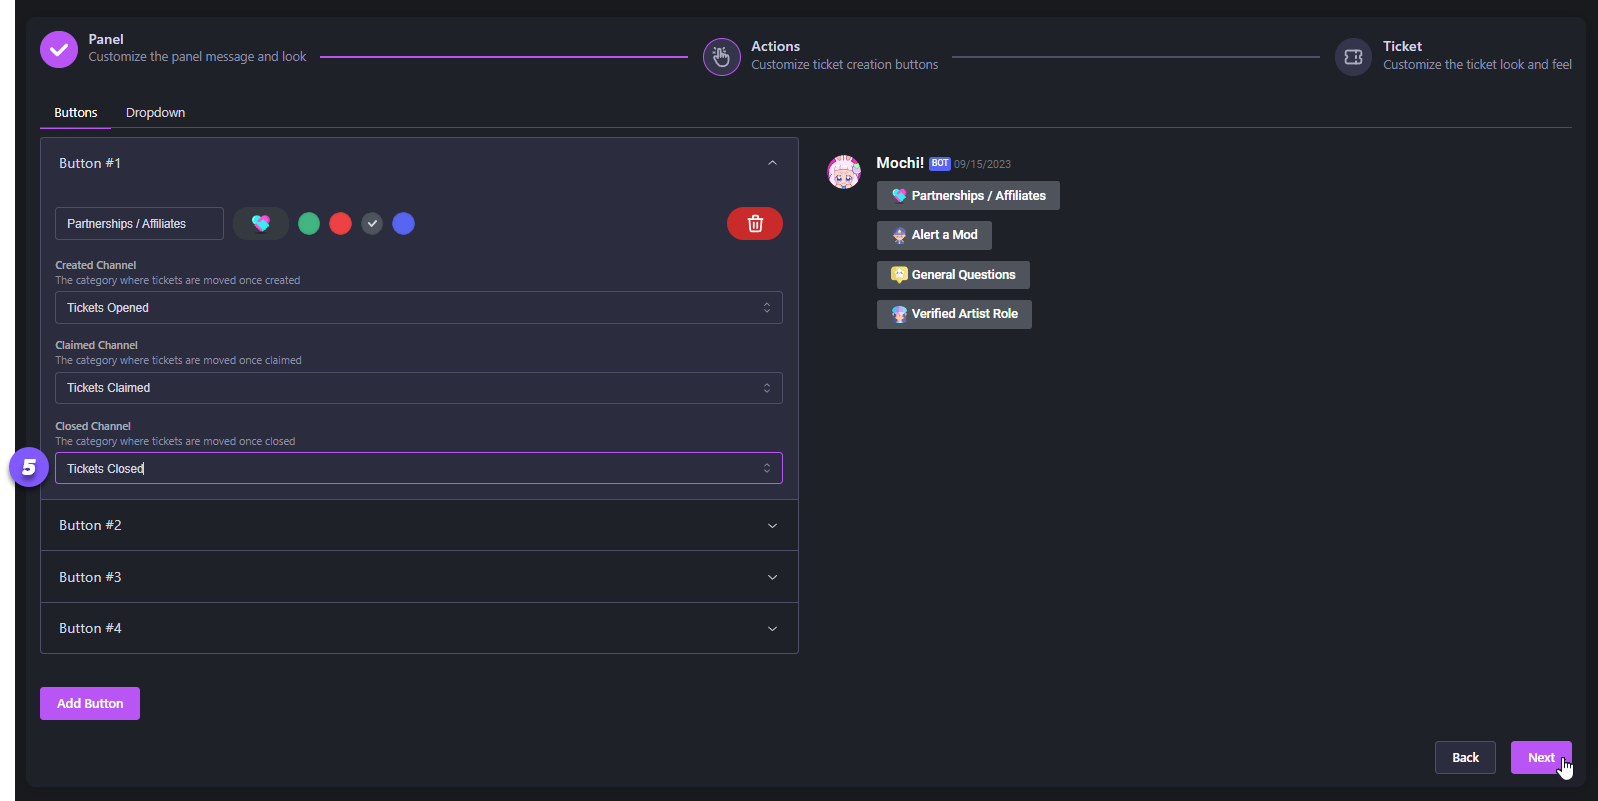
Step 5: Set the Closed Ticket Channel

Once a ticket has been closed, this category will then store the conversation along with a downloadable transcript of the conversation. This category will be visible to both Mochi and anyone with the Manager role.

When you finish configuring your button actions, simply click on "Next" to proceed with the setup.

Last updated