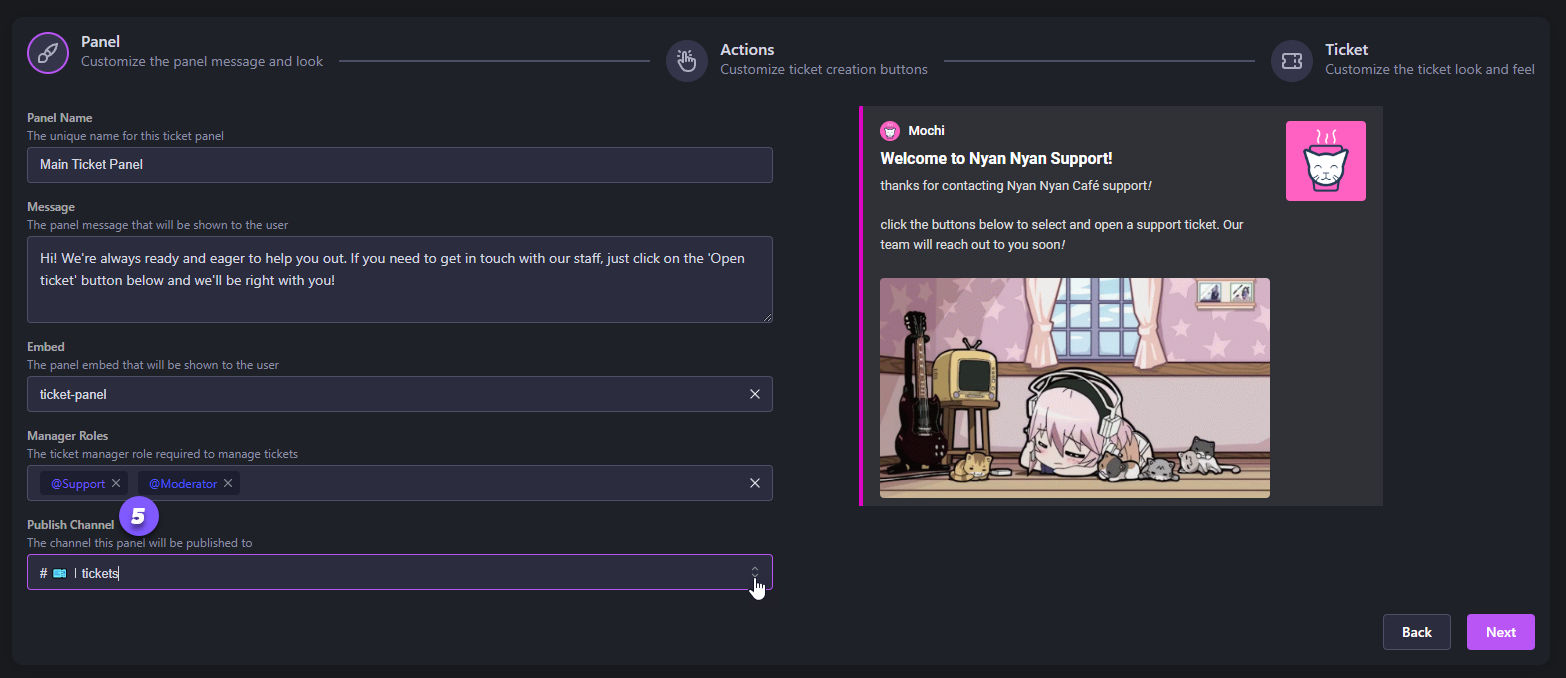
Customizing the Main Ticket Panel

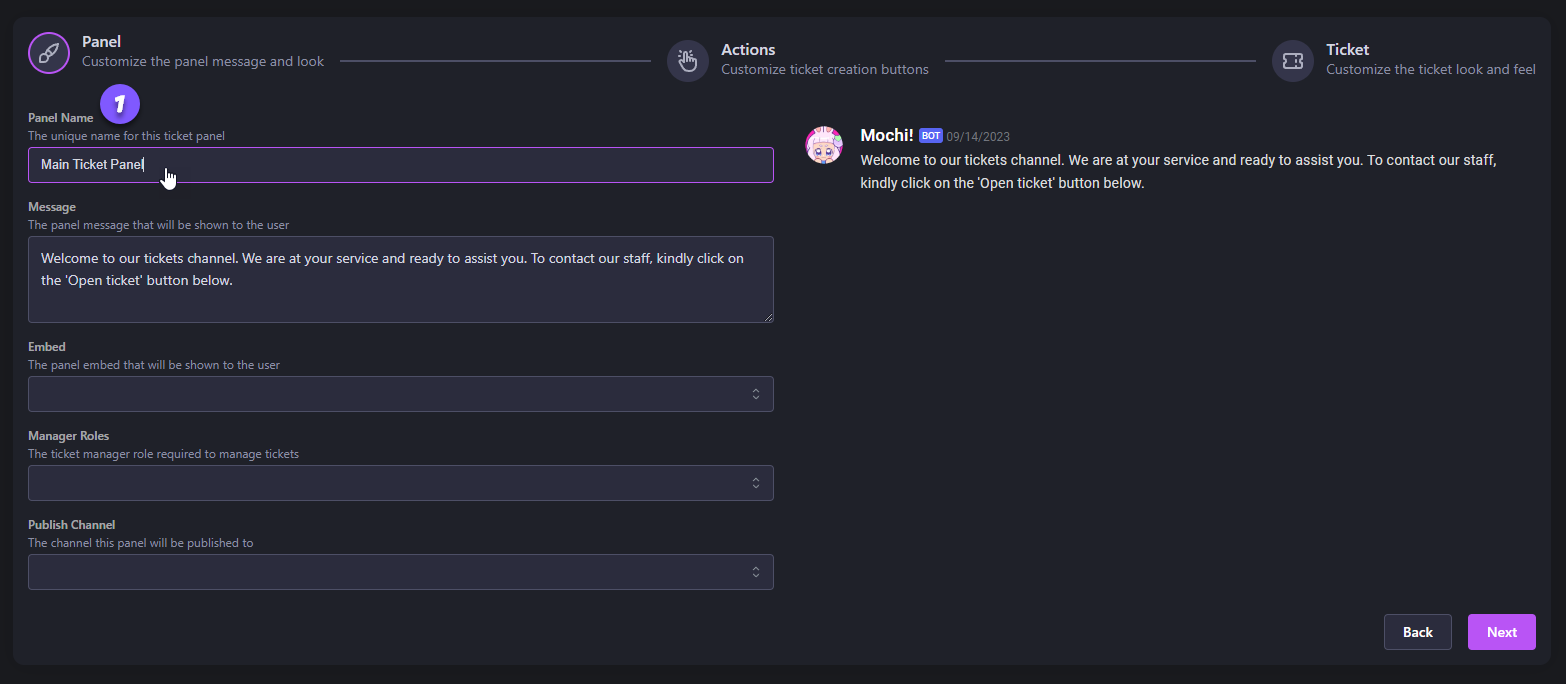
Step 1: Name the Support Panel

First things first, let's give your main ticket panel a unique name in the "Panel Name" section. This panel will display all your ticket options. You can create up to 10 panels on a single server with Mochi.

Entering a unique name for the Ticket Panel

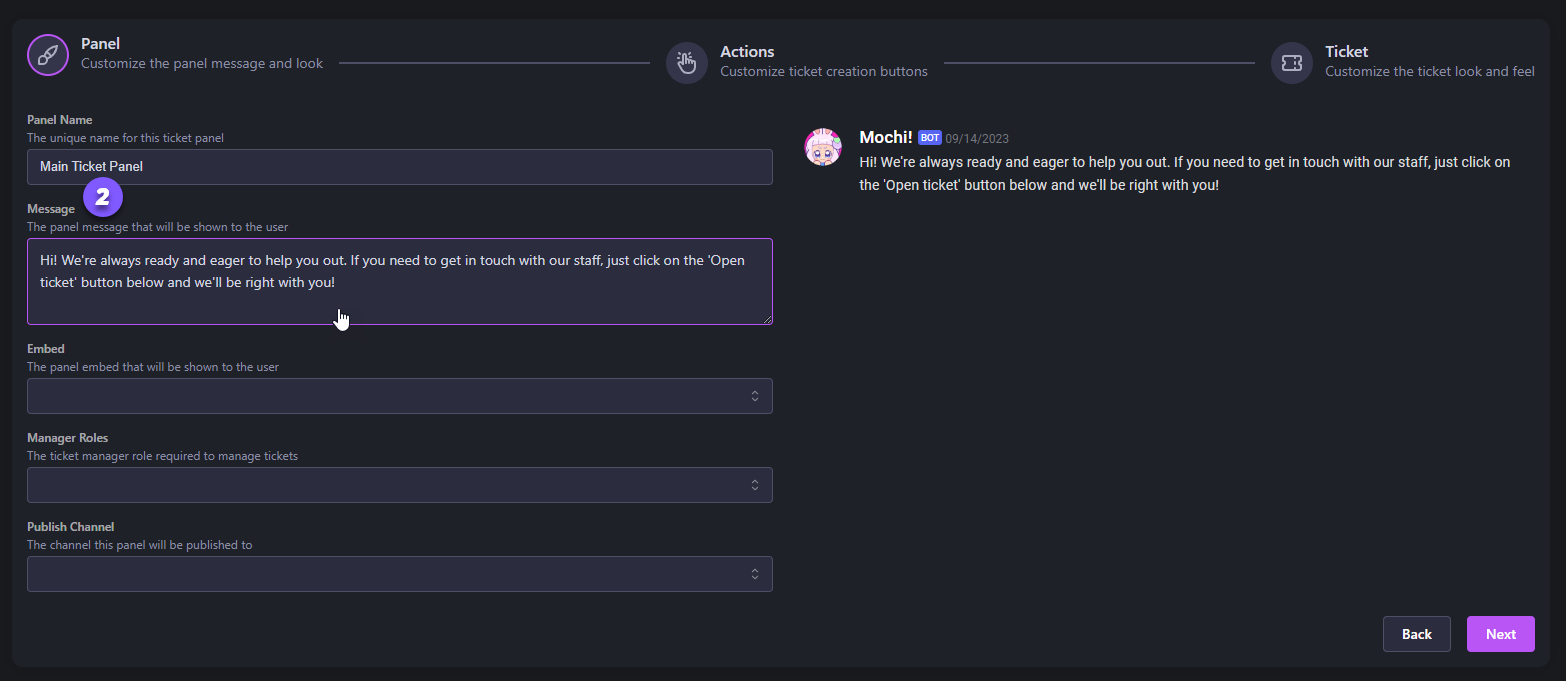
Step 2: Add a Support Message (Optional)

If you want to add a friendly message that will show up above your main support ticket panel, simply use the "Message" field on your dashboard.

Adding a custom message for your Ticket Panel

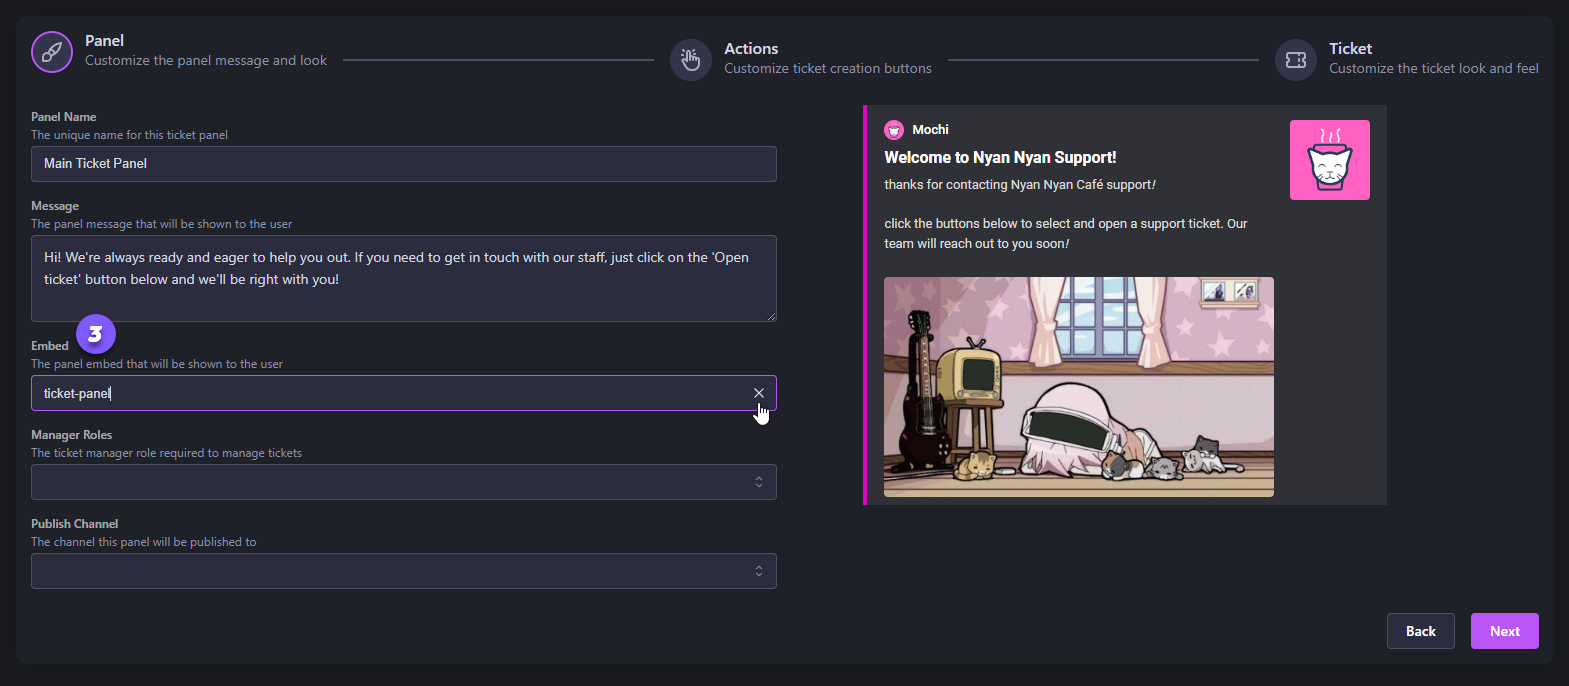
Step 3: Select the Ticked Embed

To make your ticket panel stand out, use the Mochi embed builder to customize it and create a unique look. Once you've created your embed, just choose it from the "Embed" dropdown menu. And don't forget, you can always preview your design to see how it looks!

Selecting the Ticket Embed

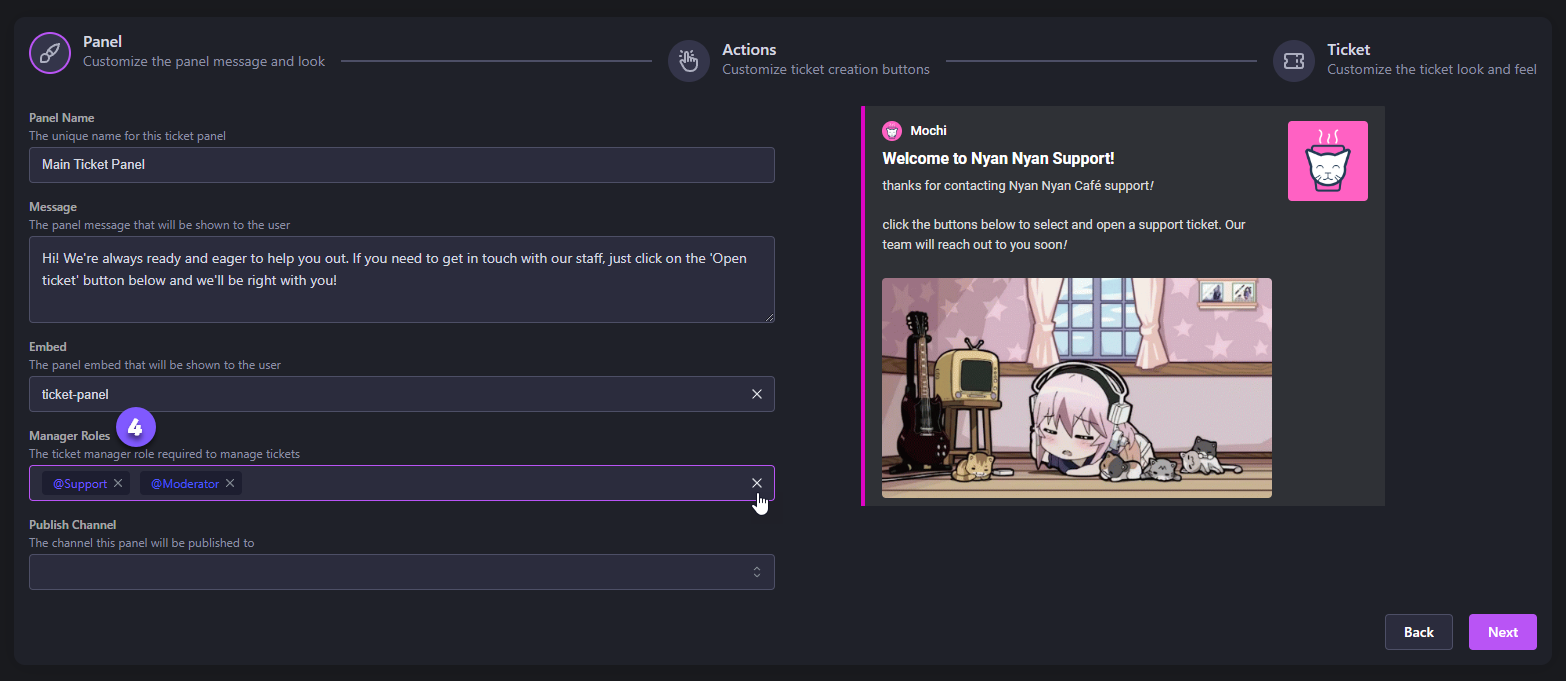
Step 4: Select the Support Roles

When a new ticket comes in, we want to make sure it gets handled quickly and efficiently. That's where our Manager Roles come in! These roles will receive a notification as soon as a new ticket comes in, so they can jump right in and take care of it. They'll have access to all the channels they need to respond, close, or claim the tickets.

Selecting the Manager Roles

Step 5: Select the Ticket Channel

Now, we just need to choose which channel to display the support channel. To do this, head over to the "Publish Channel" section and select the text channel of your choice. Once you've made your selection, just hit "Next" to continue with the setup.

Setting the Publishing Channel

Last updated