Twitch Alerts Setup

In this part of the guide, we'll walk you through setting up Twitch Notifications for your server. You'll need to create a ping role and a special channel where Mochi can send your Twitch Notifications. Let's dive right in!

Step 1: Add a New Streamer

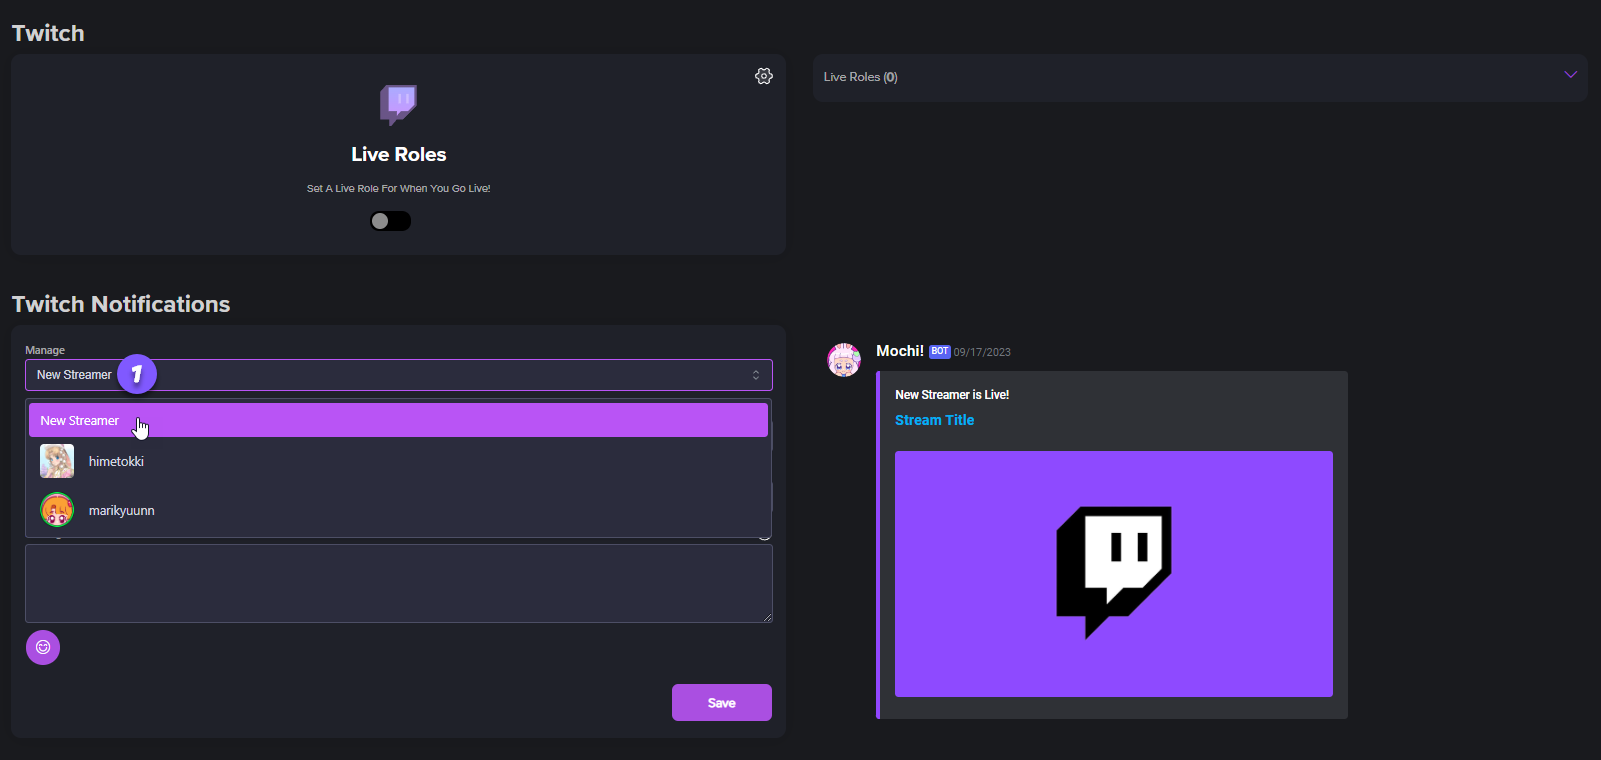
To get started, just head over to the "Manage" section and choose "New Streamer".

Adding a New Streamer to the Twitch Notifications List

Step 2: Search for the Streamer

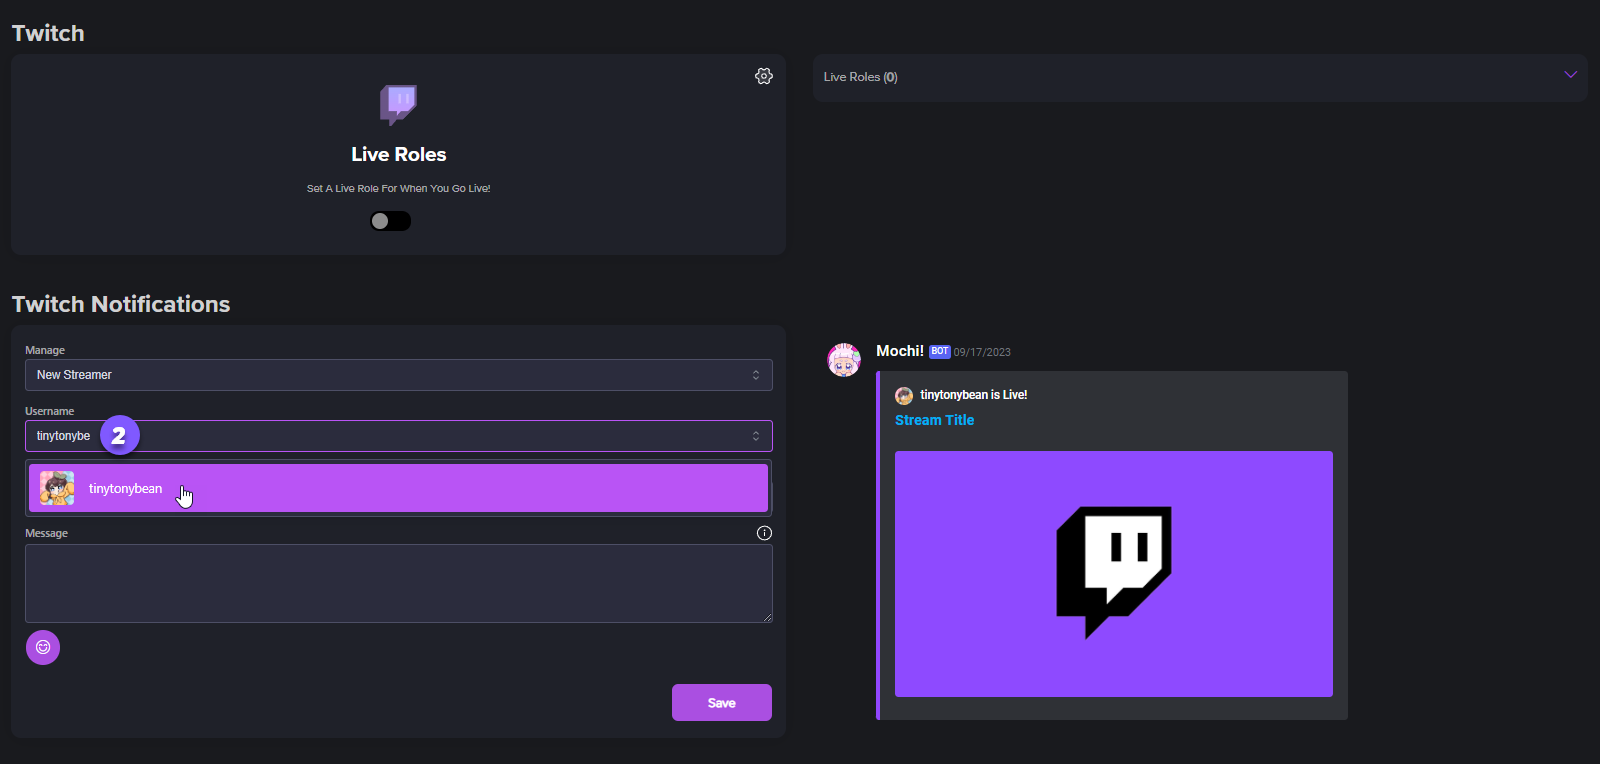
To find your Twitch channel or favorite streamer, just use the search bar in Mochi. Simply type their name in the "User Name" section and click on their name to select them. It's that easy!

Searching for a Streamer on the Twitch Notifications Dashboard

Step 3: Select the Announcement Channel
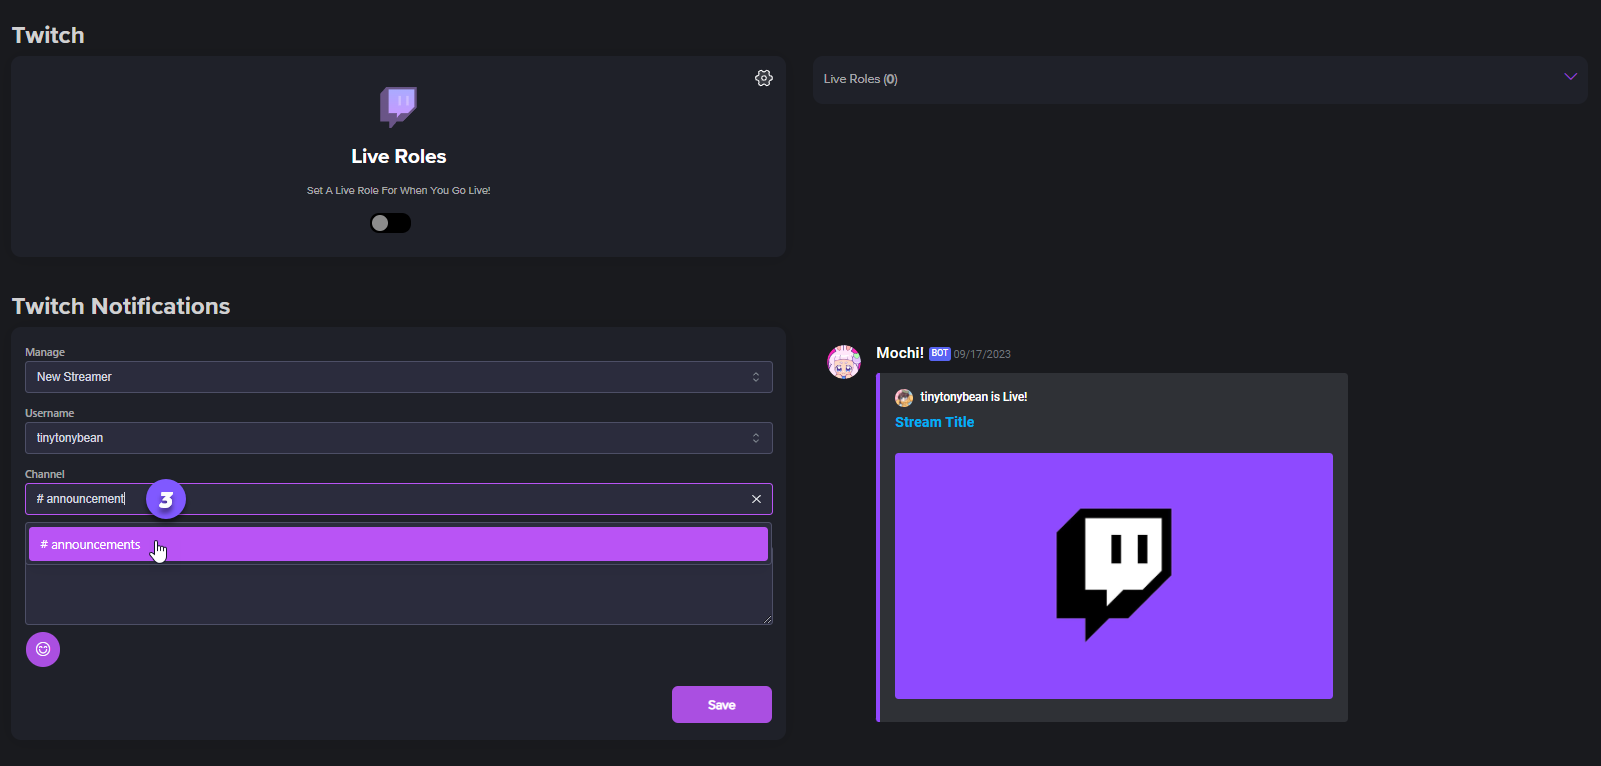
Now it's time to choose where Mochi will post the Twitch Notifications. Go to the "Channel" section and pick your channel from the dropdown menu.

Selecting your Announcement Channel on the Twitch Notifications Dashboard

Step 4: Set an Announcement Message

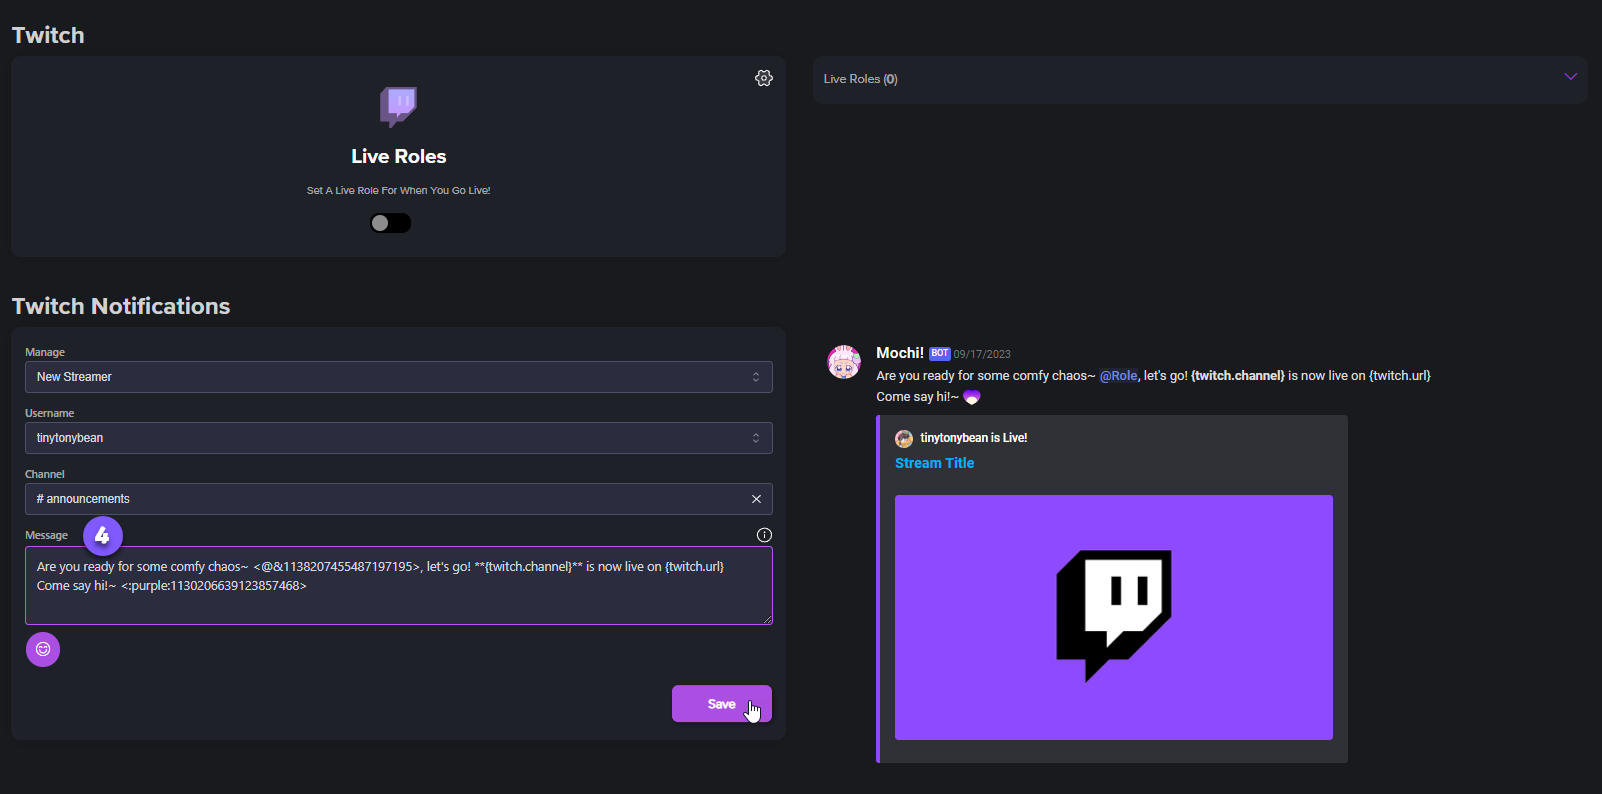
It's time to craft a friendly and exciting announcement message! Head over to the "Message" section to create a warm and welcoming announcement message. You can use Mochi variables to add a personal touch like mentioning the streamer's username {twitch.channel}, their channel URL {twitch.url}, announcement roles, and more!

Setting the Announcement Message on the Twitch Notifications Dashboard

After you've followed all the necessary steps, simply hit the "Save" button and you're all set to add the streamer to your Twitch Notifications Dashboard!

Last updated